
DIY Bathtub Reheating in the U.S.: $94 Mini-Tank Heater + Quiet Circulation Pump
Our bathtub in the U.S. does not have the Japanese-style “reheat the same bathwater” function. Long soaks cool down, and our tank water heater limits how much extra hot water I can keep adding. I built an external circulation loop with a mini-tank heater and a quiet pump. After two pump mistakes, the final system cost about $94 in parts and could quietly maintain — and even raise — the bath temperature.
Bottom line
In the final setup I removed the original 120V submersible pump from the bath and moved the pump, heater, AC adapter, and other electrical components outside the tub. Only the intake and return hoses are in the bathwater.
The system is powered from a GFCI-protected circuit. The heater and AC adapter stay on a dry, stable surface, positioned or secured so a bump, hose tug, or slip cannot drop them into the tub. I also route the hoses and fittings so a leak cannot run directly into electrical equipment. CPSC guidance likewise emphasizes keeping electrical appliances away from water and using GFCI protection. [2][3]
I did not add separate system-level protections such as an independent loss-of-flow heater shutdown in this experiment. This is a personal home DIY test; if you try a similar idea, pay close attention to water/electrical separation, fall prevention, and leak control, and do so at your own responsibility.
Why I built it: no Japanese-style bath reheating in our home
Not every U.S. home is the same, but our bathtub does not have the common Japanese feature that draws bathwater out, reheats it, and returns it to the tub. During a long soak, the water simply cools.
I can add more hot tap water, but our domestic hot-water system uses a storage tank. Instead of repeatedly adding fresh hot water, I wanted to see whether I could recirculate the bathwater through a small external heater.
The final loop: tub → quiet pump → 1500W heater → tub
The final version keeps electrical equipment out of the bathwater. Only water travels outside the tub through the hoses, gets circulated and heated, then returns. Looking at the water and power paths separately makes the system easy to understand.
The key design change was moving mains-powered equipment out of the tub and circulating only water through the hoses.
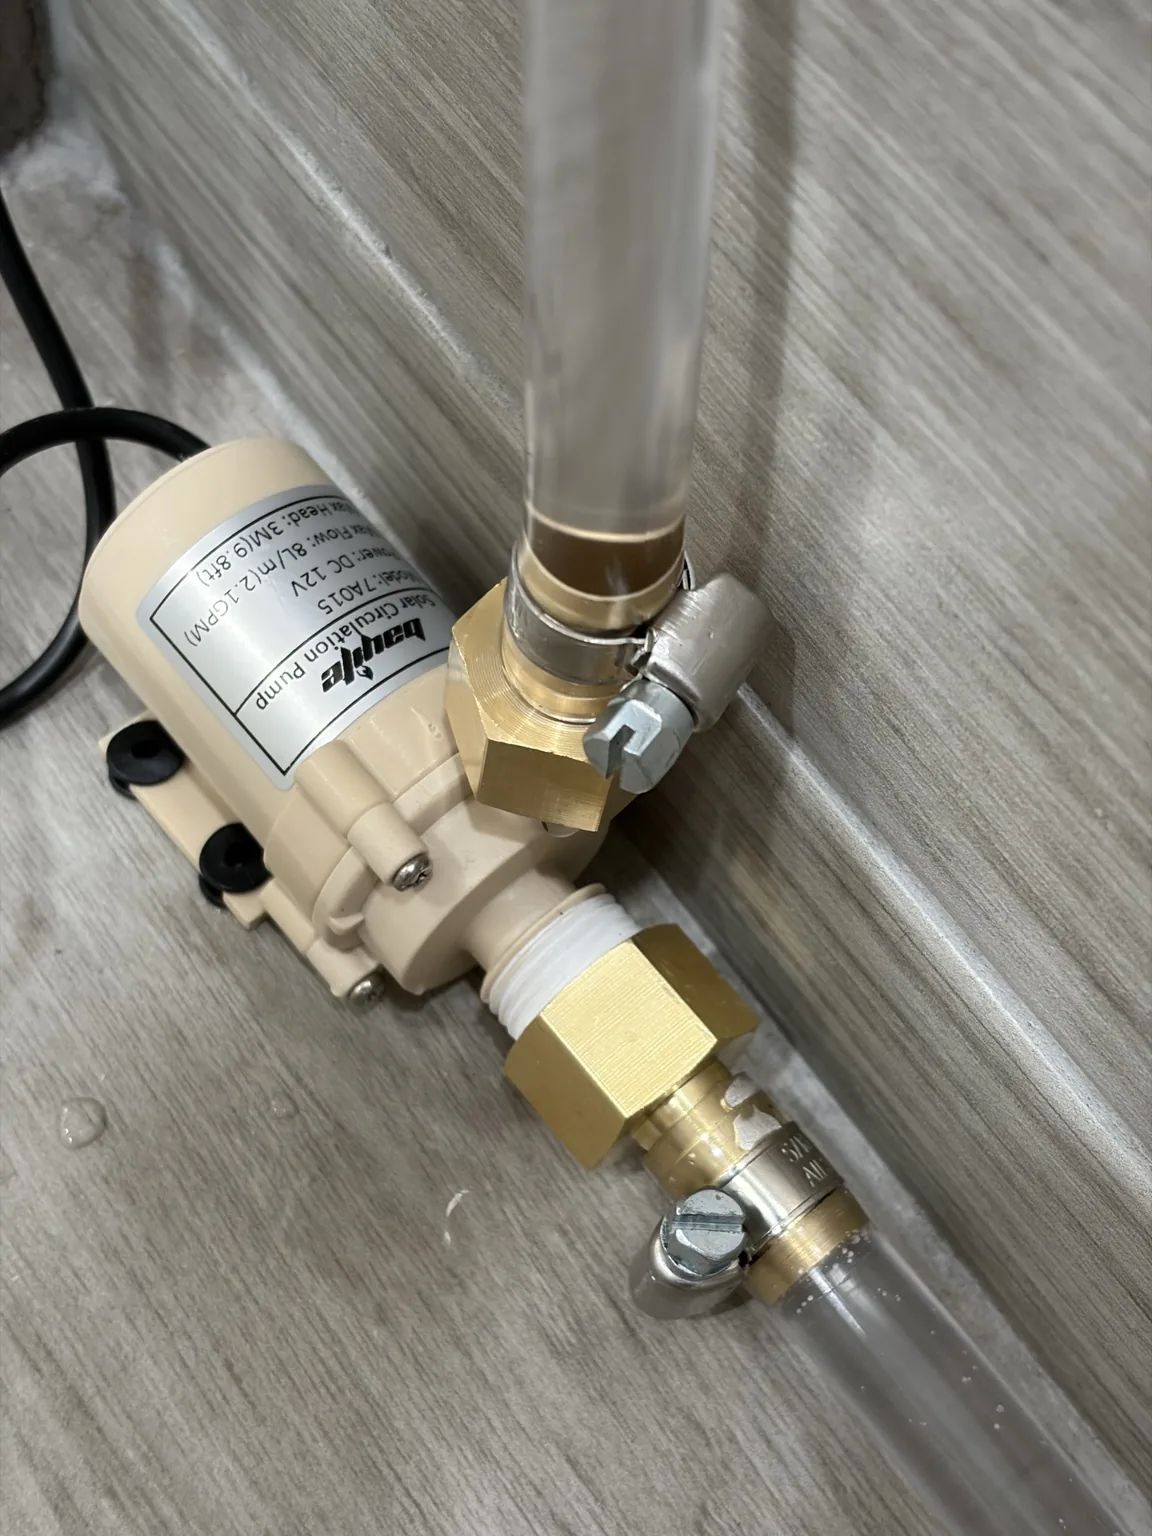
The final pump is a Bayite BYT-7A015 [Gear 1]. Published specifications list 12V DC, up to 8 L/min (2.1 GPM), 3 m (9.8 ft) head, non-self-priming operation, circulating-water temperature up to 100°C, and 30 dB at 1 m. It also includes an AC-to-12V adapter. [1]
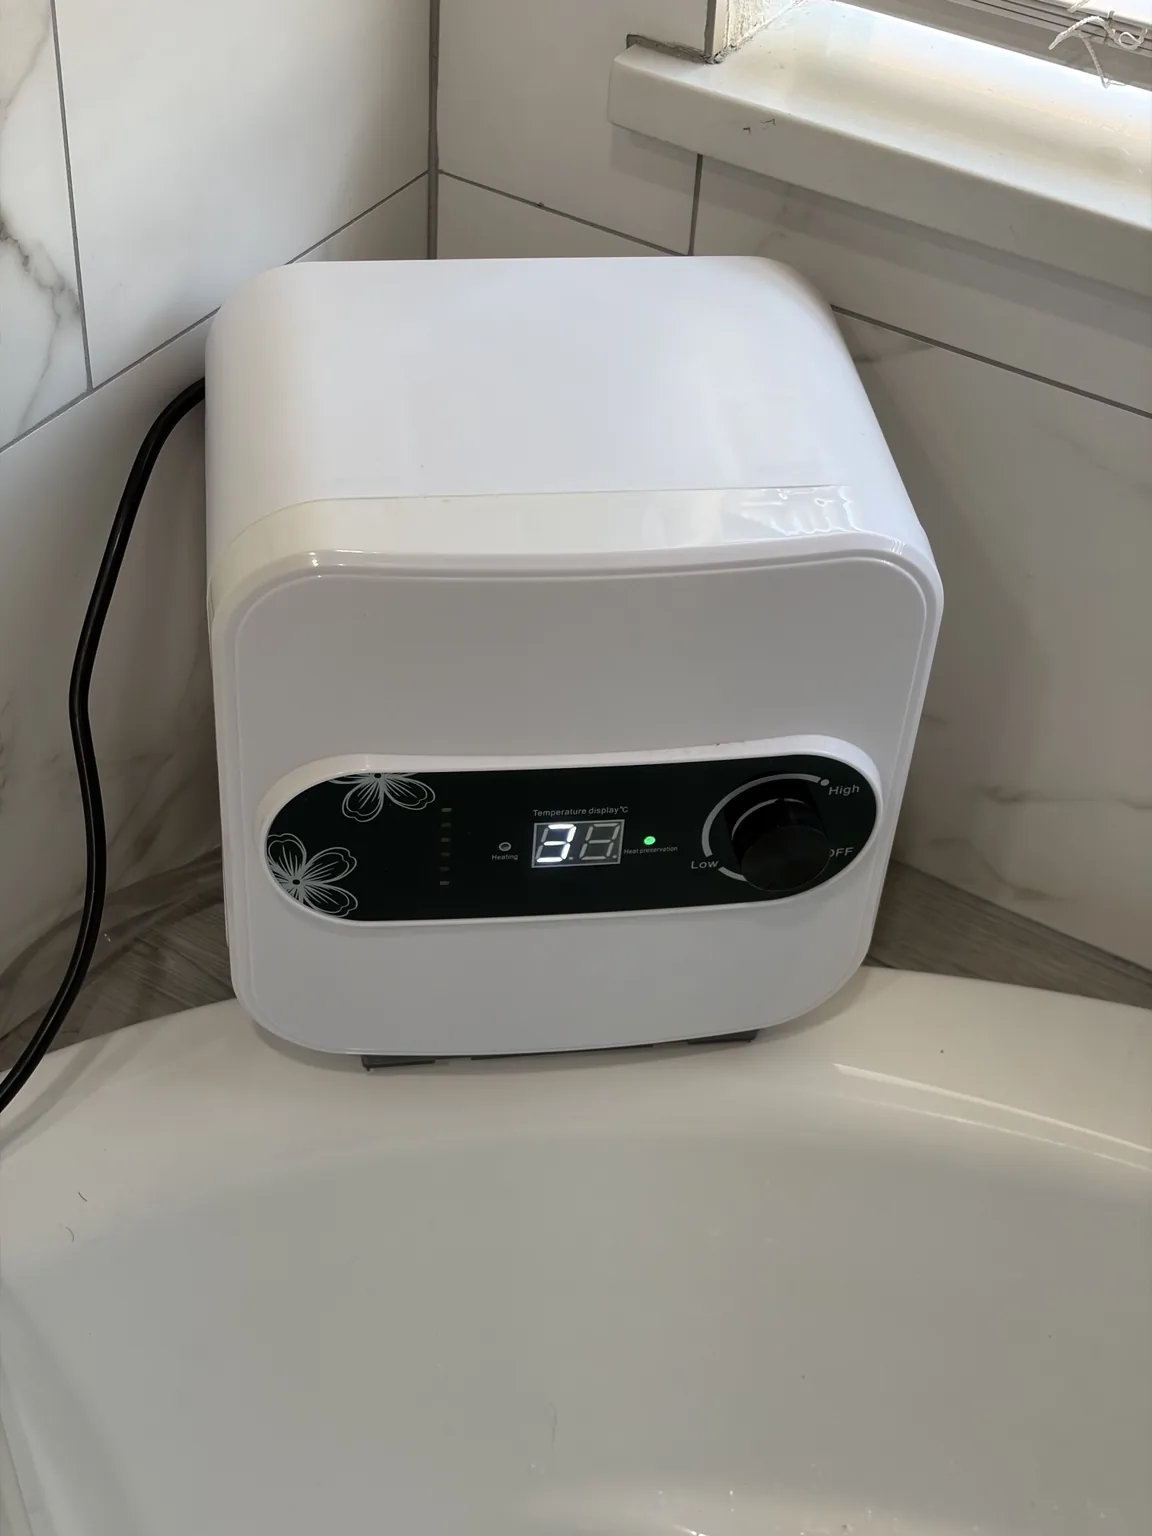
I used 1/2" ID clear PVC hose [Gear 2] and 1/2" FNPT-to-1/2" hose-barb adapters [Gear 3]. The 1500W mini-tank heater used for the actual test [Gear 4] cost $49.99 when I bought it, but that exact model is no longer sold. I list a currently available similar-spec alternative later in the article.
For this 1500W mini-tank heater, the pump's rated 2.1 GPM was enough to maintain and raise bath temperature. I did not need maximum flow; I needed a quiet, continuous circulation loop.
This pump cannot pull air out of a dry suction line by itself, so the suction hose and pump chamber need to be filled with water before startup. One option is to use the old submersible pump briefly to push water through the loop until water returns to the tub. Another is to fill the suction hose and establish a siphon. In either case, keep the circulation pump below the tub water level and start it with an unbroken water column.
If the loop can retain its water between uses, the next startup becomes much easier. I traded self-priming convenience for much lower noise.
Parts cost: $93.65 for the final system I actually used
| Part | Purchase price | Notes |
|---|---|---|
| Bayite BYT-7A015 12V quiet circulation pump | $28.99 | Non-self-priming; power adapter included |
| 1/2" ID clear PVC hose | $7.08 | Used for the circulation loop |
| 1/2" Female NPT → 1/2" hose barb connectors | $7.59 | Direct connection to the existing 1/2" hose |
| 1500W mini-tank water heater | $49.99 | The exact model I used is no longer listed |
| Total | $93.65 | Before tax; excludes tools and the failed pump |
First mistake: the submersible pump was rated for only 95°F / 35°C
My first version used an AquaMiracle 120V submersible pump [Gear 5] sitting directly in the tub and feeding the external heater. It circulated water and did raise the bath temperature.
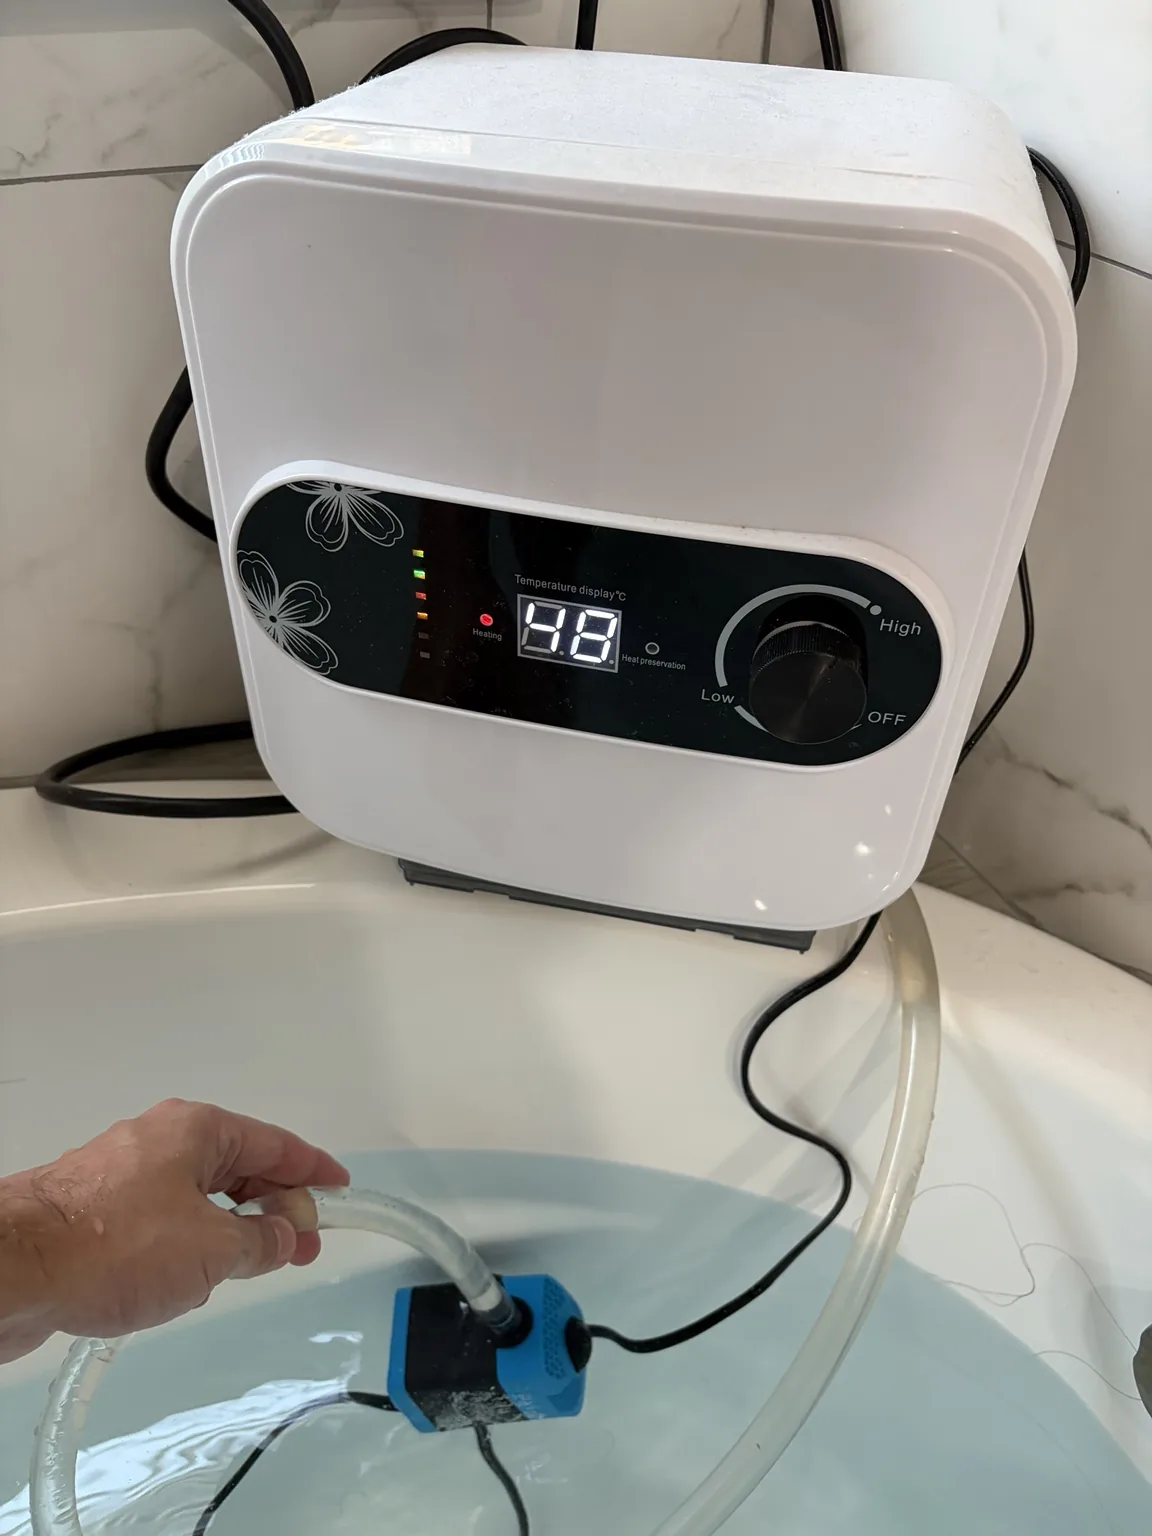
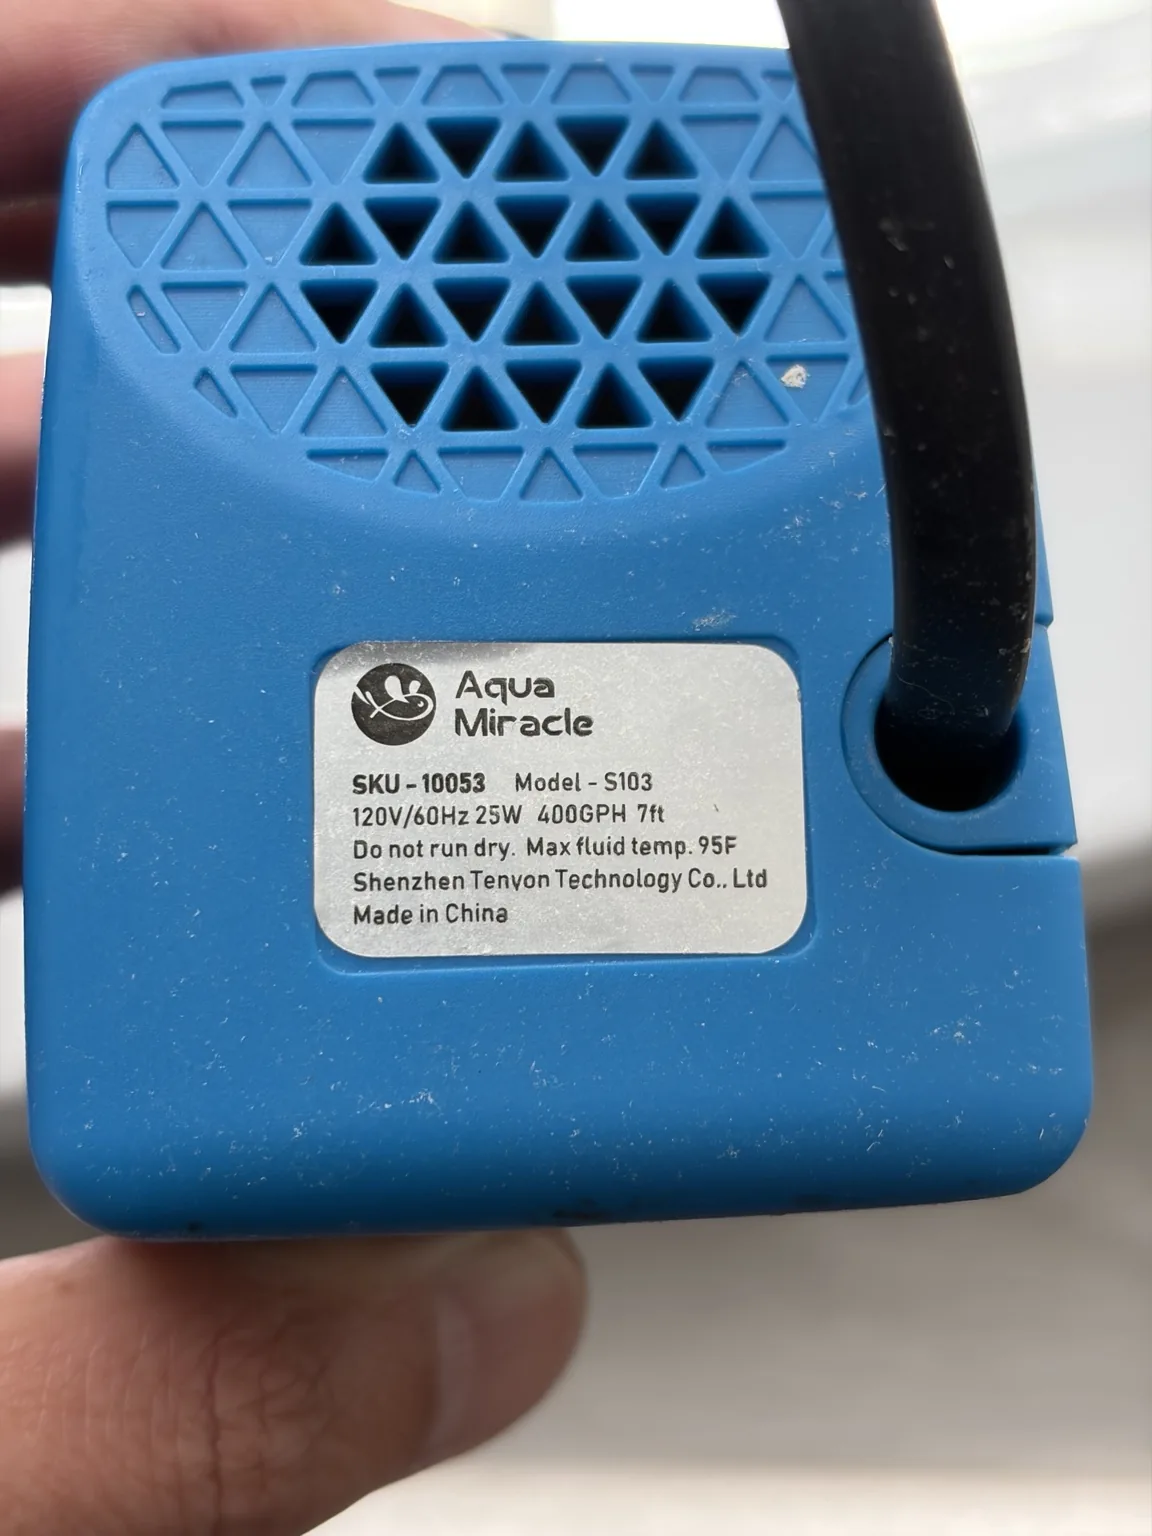
That exposed two issues. First, the label showed a 95°F (about 35°C) maximum fluid temperature, so a 40°C-class bath was outside its temperature rating. Second, even on a GFCI-protected circuit, the 120V pump itself was sitting in the same water I was soaking in.
So the next design goal became: remove electrical equipment from the tub and leave only hoses in the water. Once the pump moves outside the tub, startup may require pulling water through an air-filled suction line. That is why my next experiment used a warm-water-capable self-priming pump.
Second mistake: the external self-priming pump was too loud
Next I bought a VEVOR 110V self-priming diaphragm pump [Gear 6]. The main reason for choosing self-priming was not simply easier plumbing—it was to move the 120V pump out of the bathtub while still being able to pull bathwater reliably through a hose.
That part worked exactly as intended. The tub contained only hoses, startup was easy, and flow was more than adequate: I measured 10 L in 40.2 seconds, about 14.9 L/min (3.94 GPM). Hydraulic performance was not the problem.
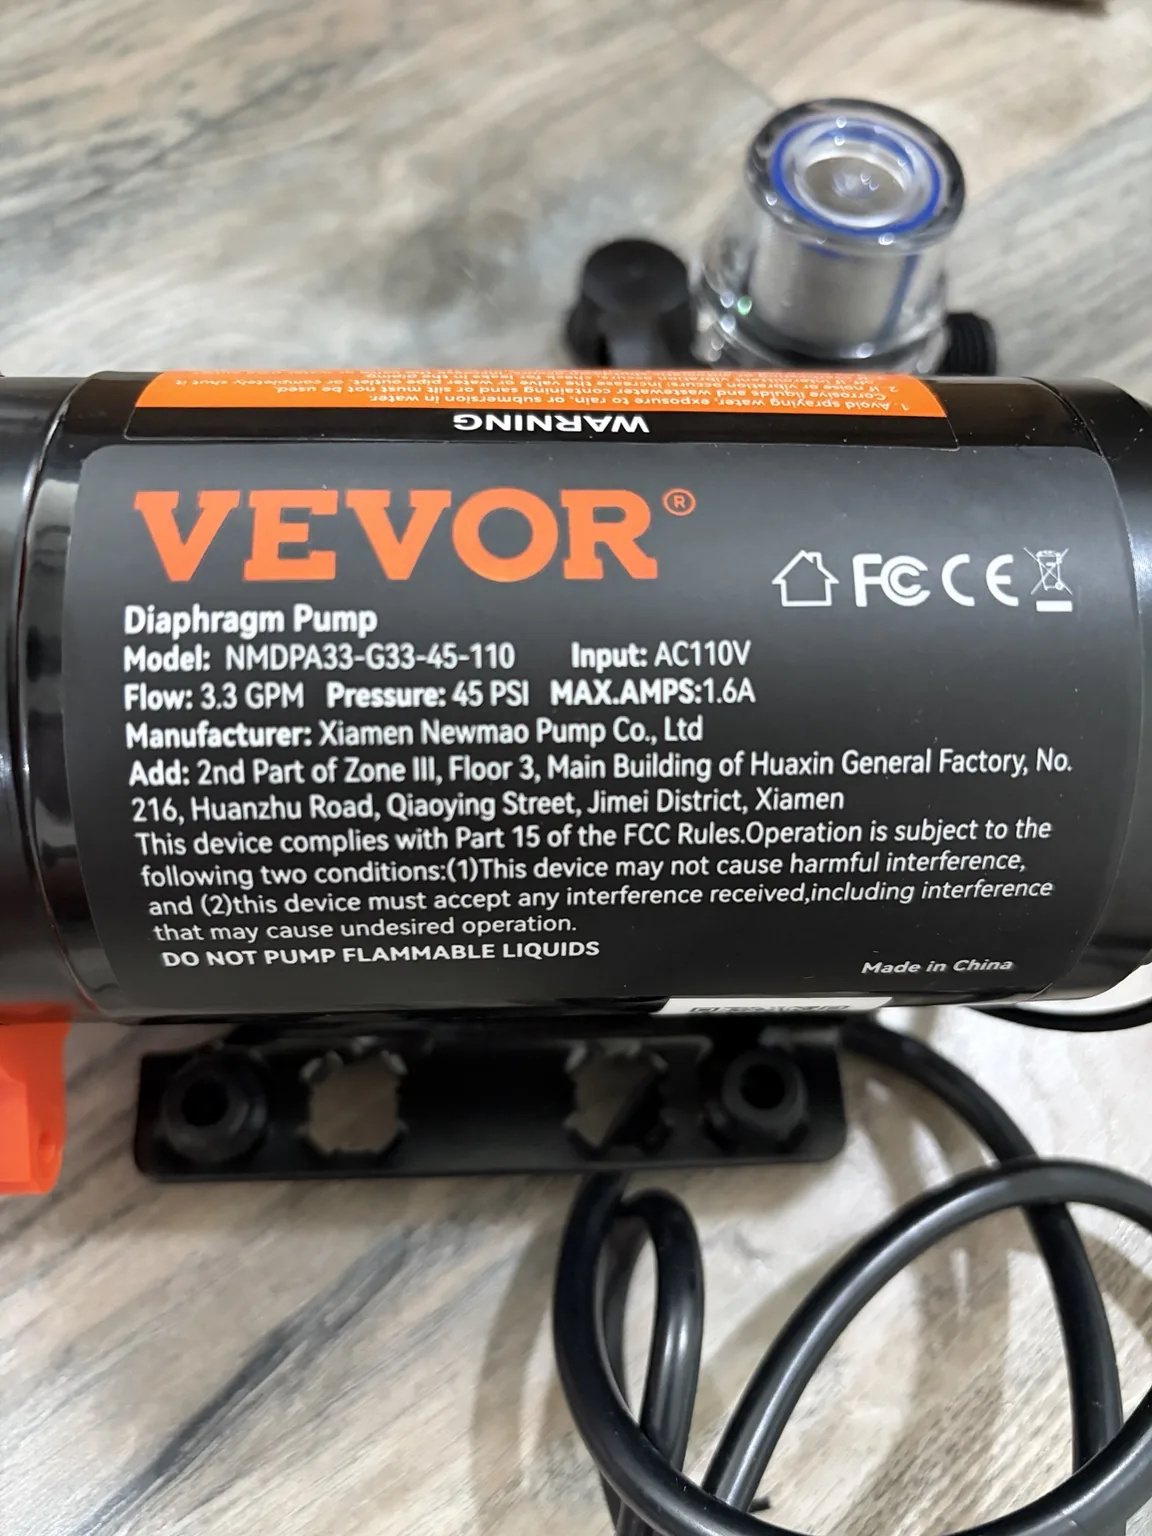
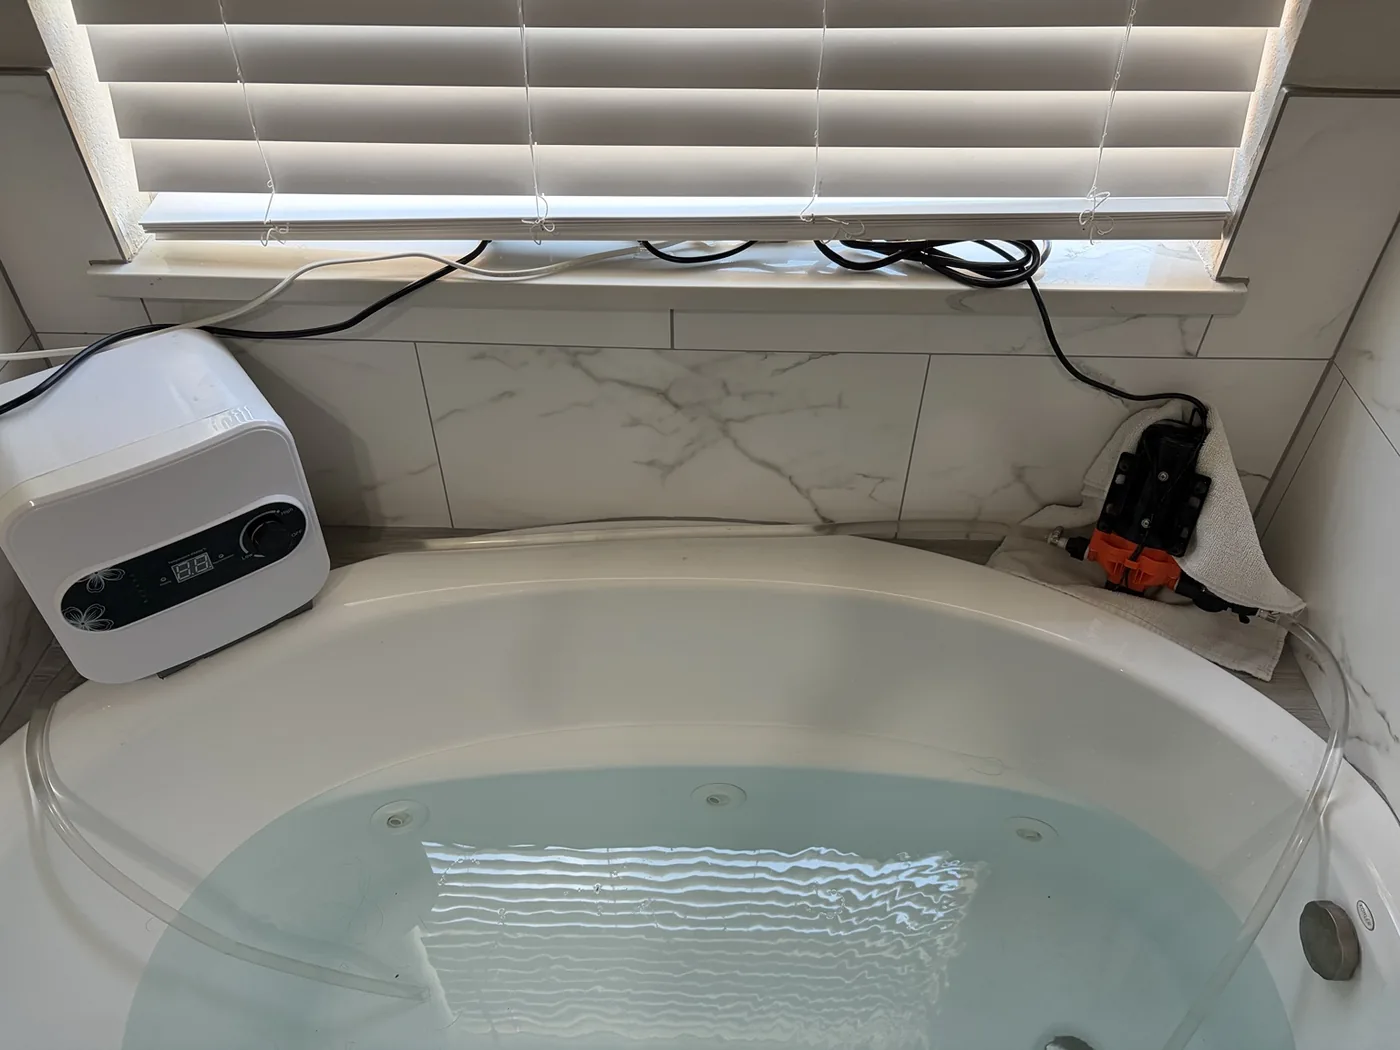
The problem was comfort. The diaphragm mechanism produced a steady, prominent mechanical sound that remained even when I isolated the pump from the floor. For a device meant to run beside a long bath, listening to it for an hour was simply not relaxing.
That changed the priority. I did not need maximum flow; I needed quiet continuous operation during a long soak. Self-priming could be replaced by assisted priming or a siphon, so I switched to the 12V brushless circulation pump.
Final test: 39.4°C → 42.3°C while I actually used the tub
With the quiet pump installed, I ran a 60-minute temperature test. I measured at 0, 15, 30, 45, and 60 minutes. The bathing pattern was 15 minutes in, 10 minutes out, 5 minutes in, 10 minutes out, 5 minutes in, then 15 minutes with nobody in the tub.
| Elapsed time | Water temperature | Condition |
|---|---|---|
| 0 min | 39.4°C / 102.9°F | Start soaking |
| 15 min | 40.4°C / 104.7°F | After 15 continuous minutes in the tub |
| 30 min | 40.8°C / 105.4°F | 10 min break + 5 min soak |
| 45 min | 41.7°C / 107.1°F | 10 min break + 5 min soak |
| 60 min | 42.3°C / 108.1°F | Final 15 min unoccupied |
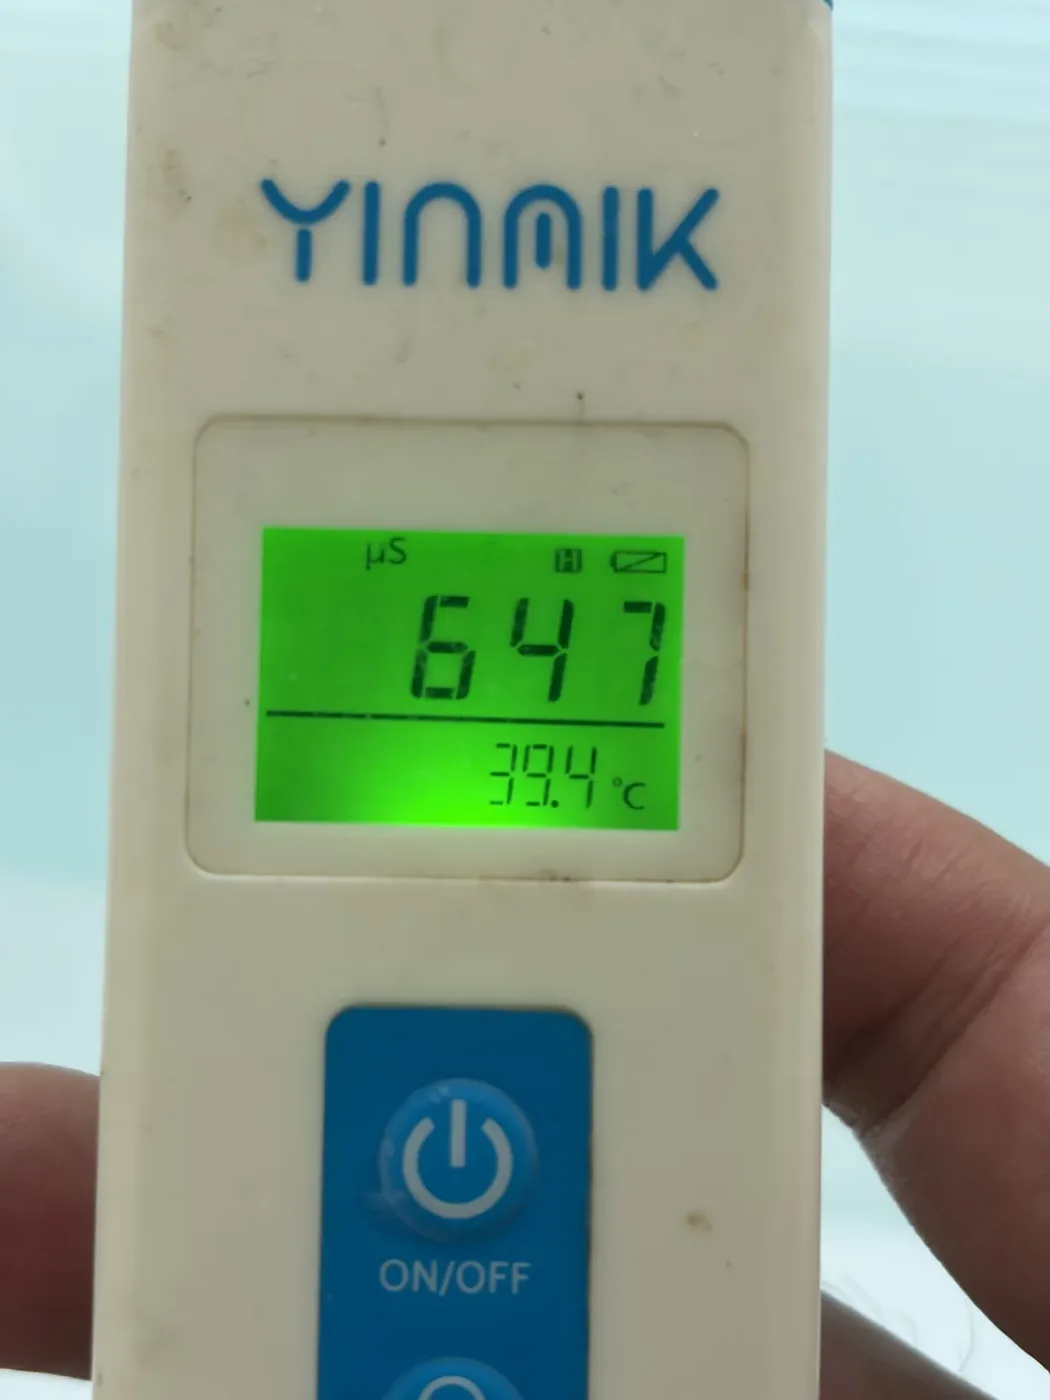
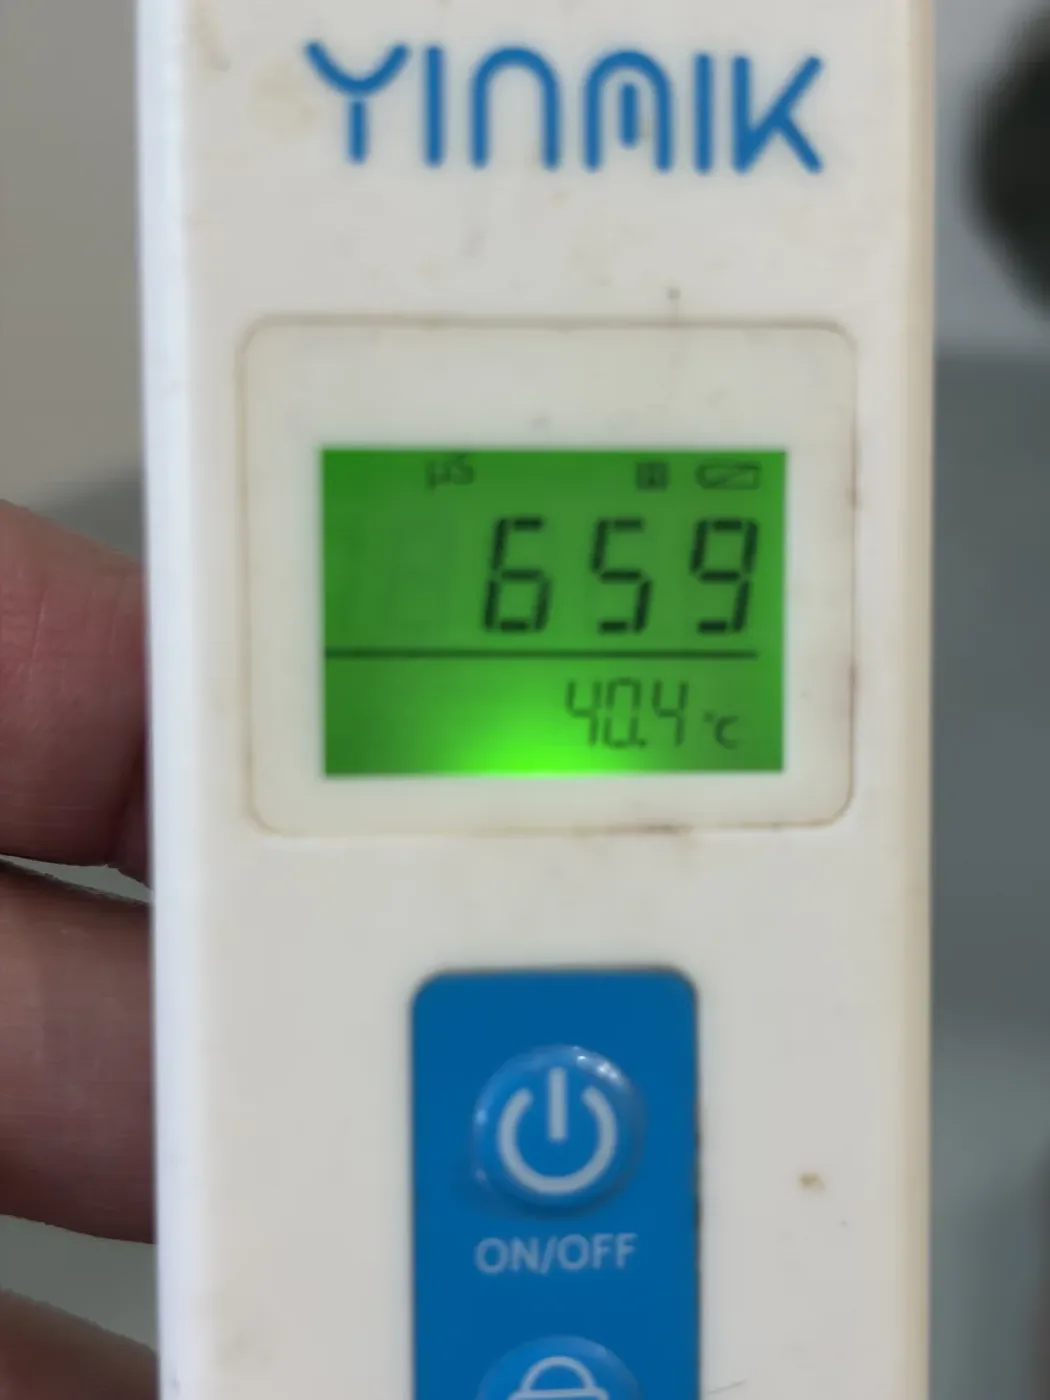
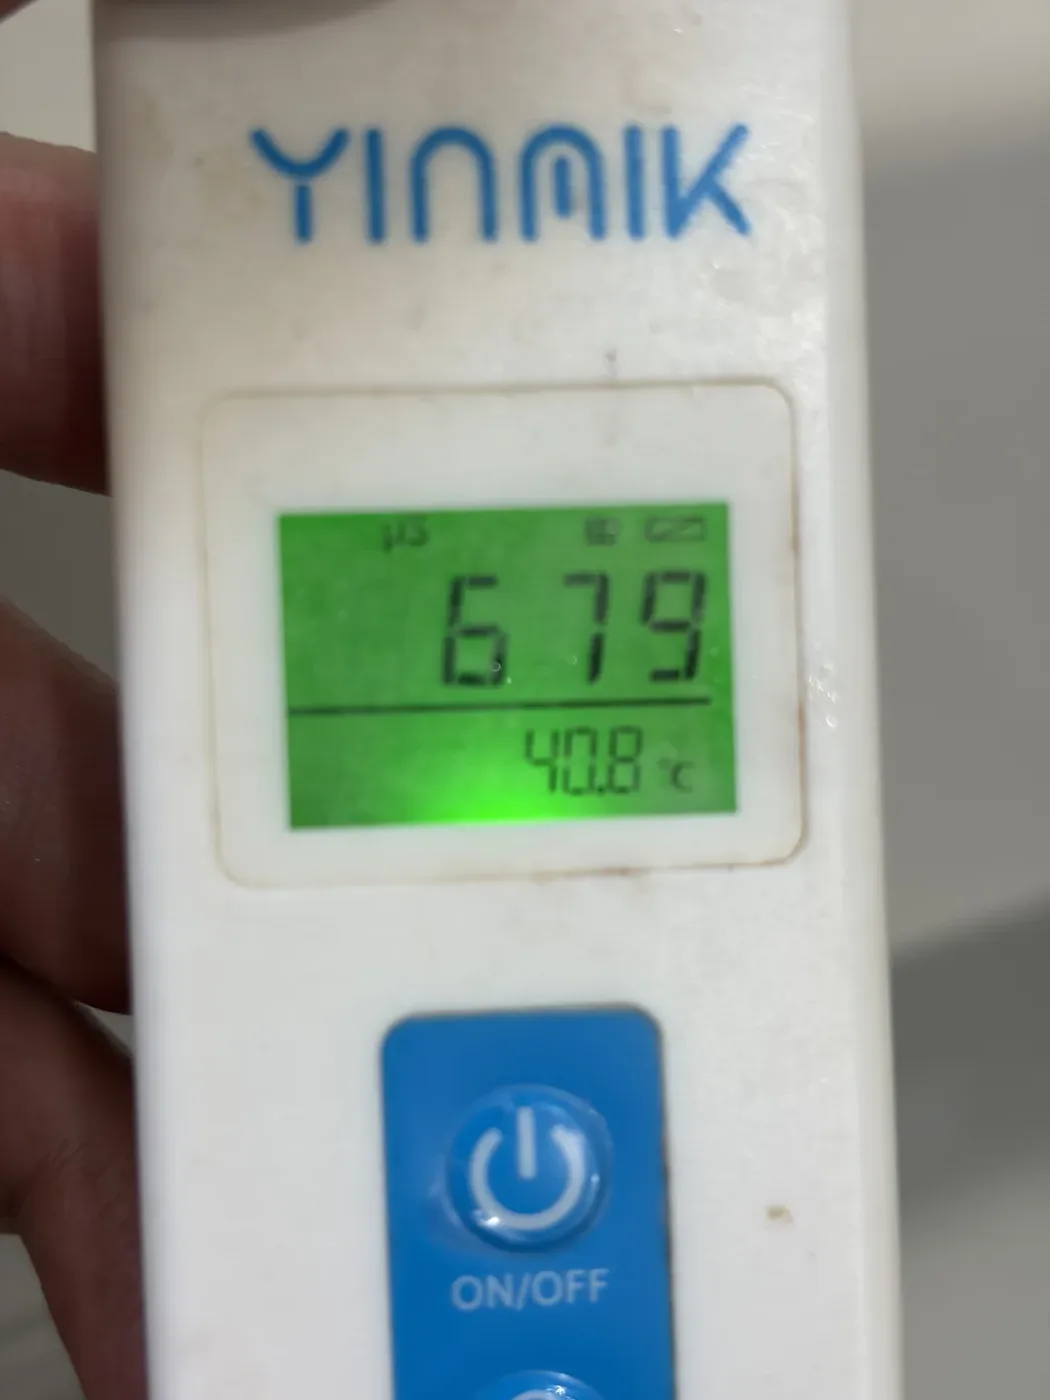
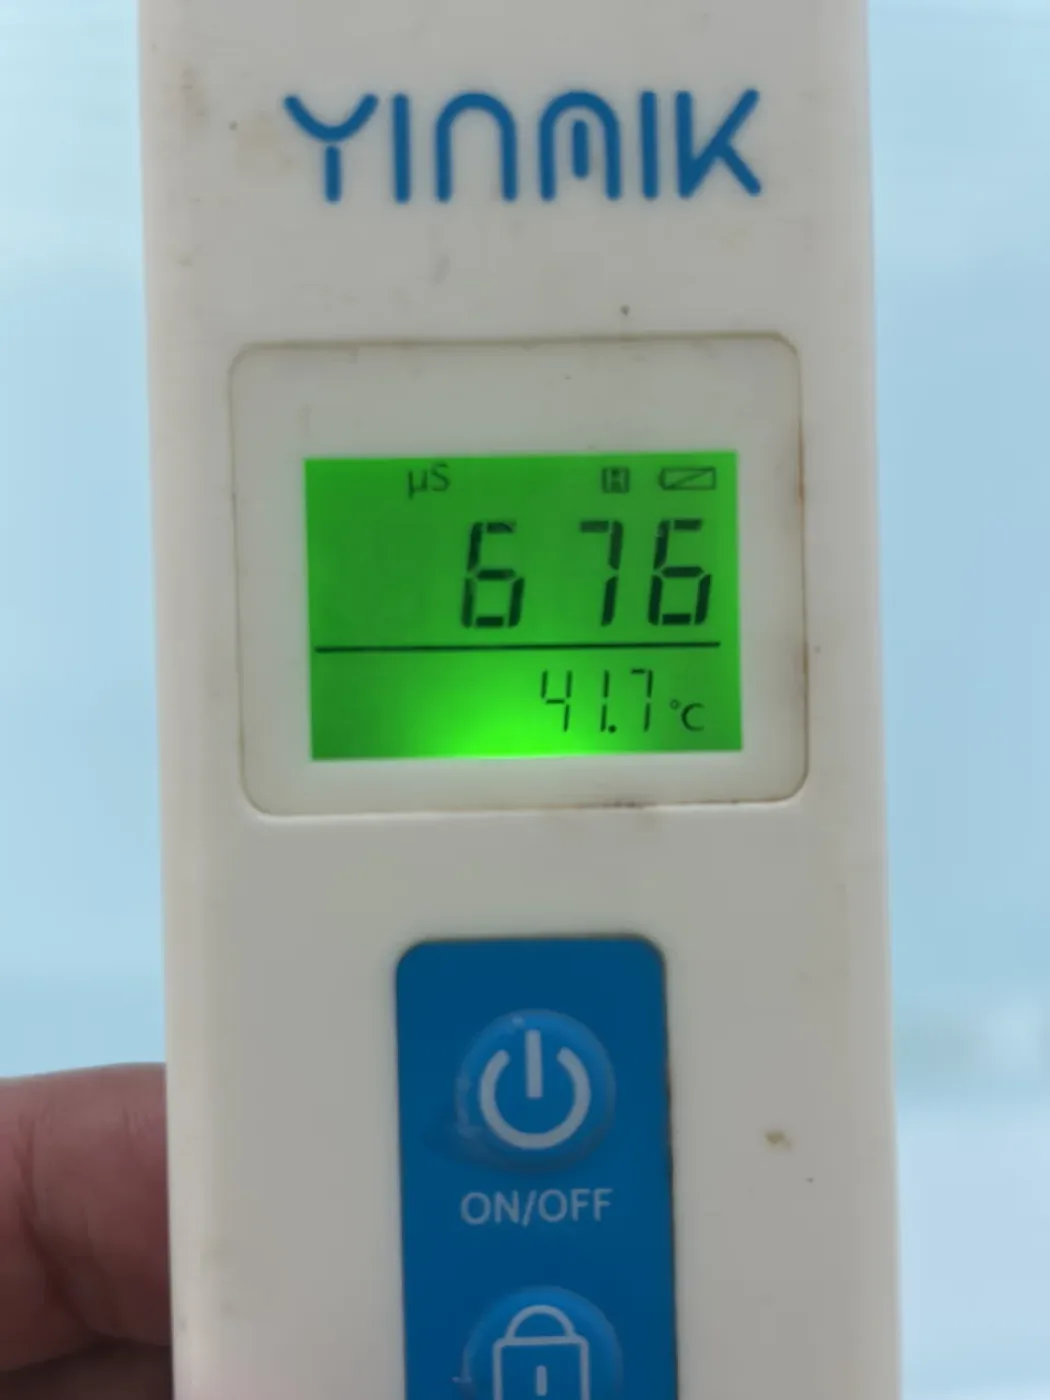
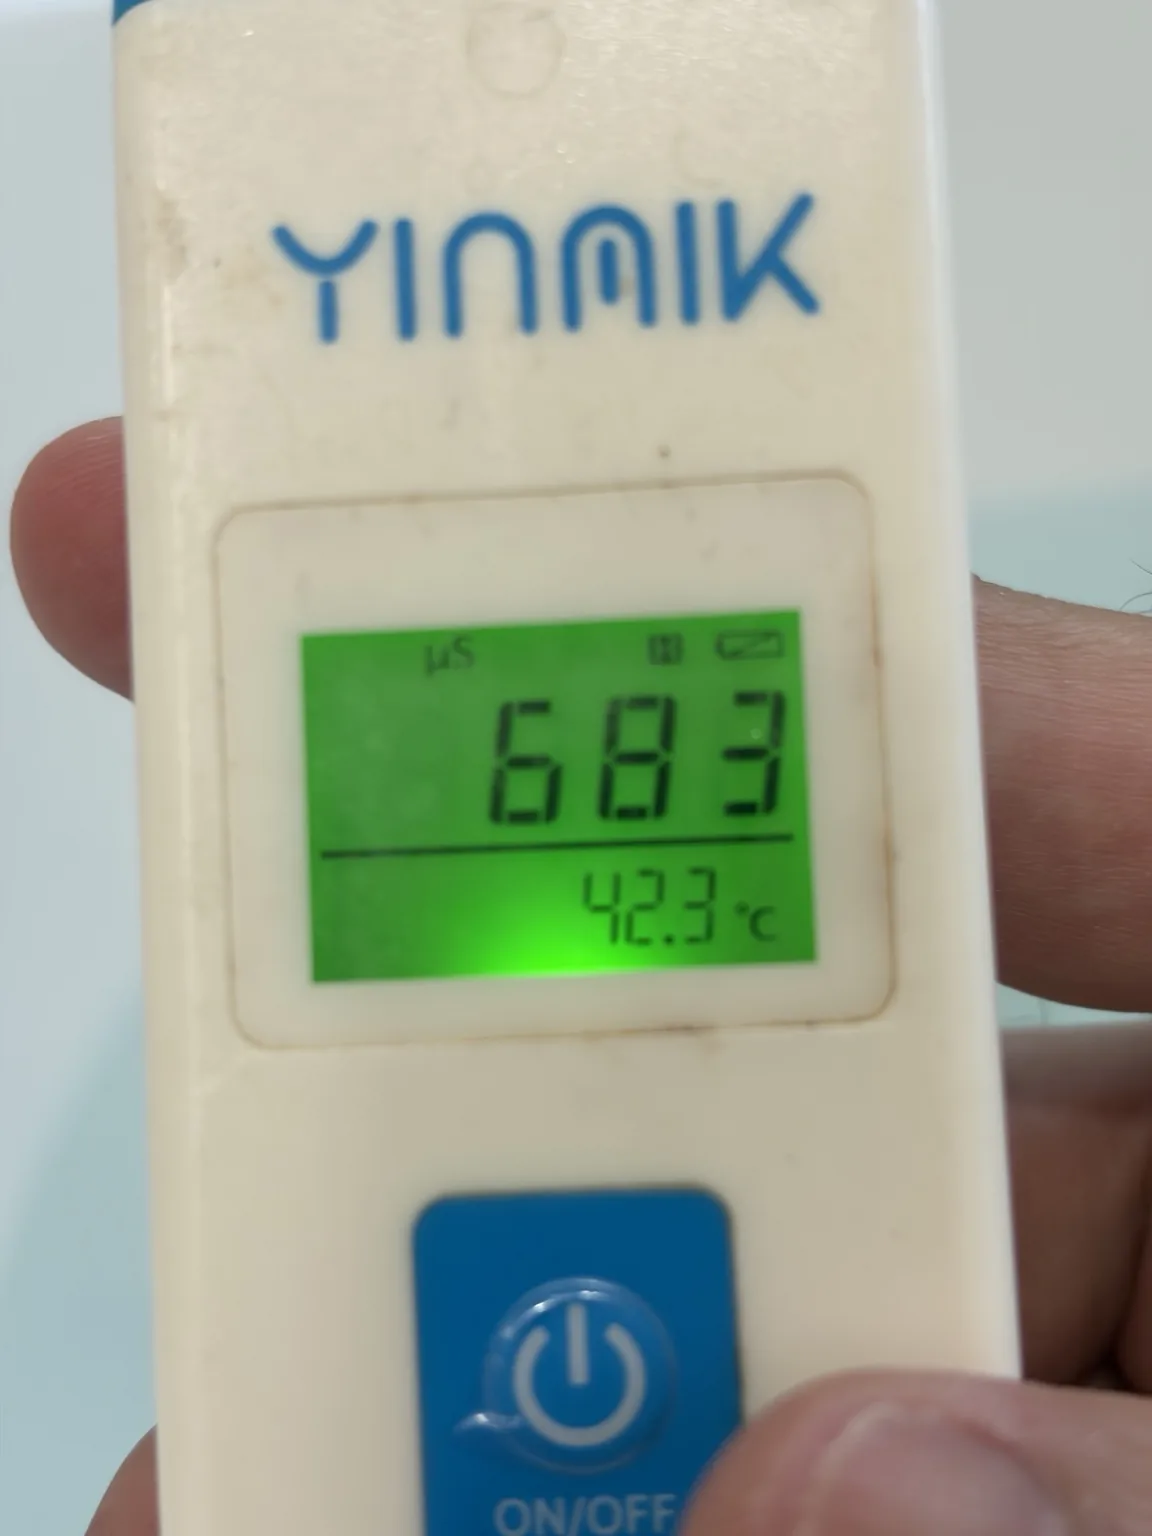
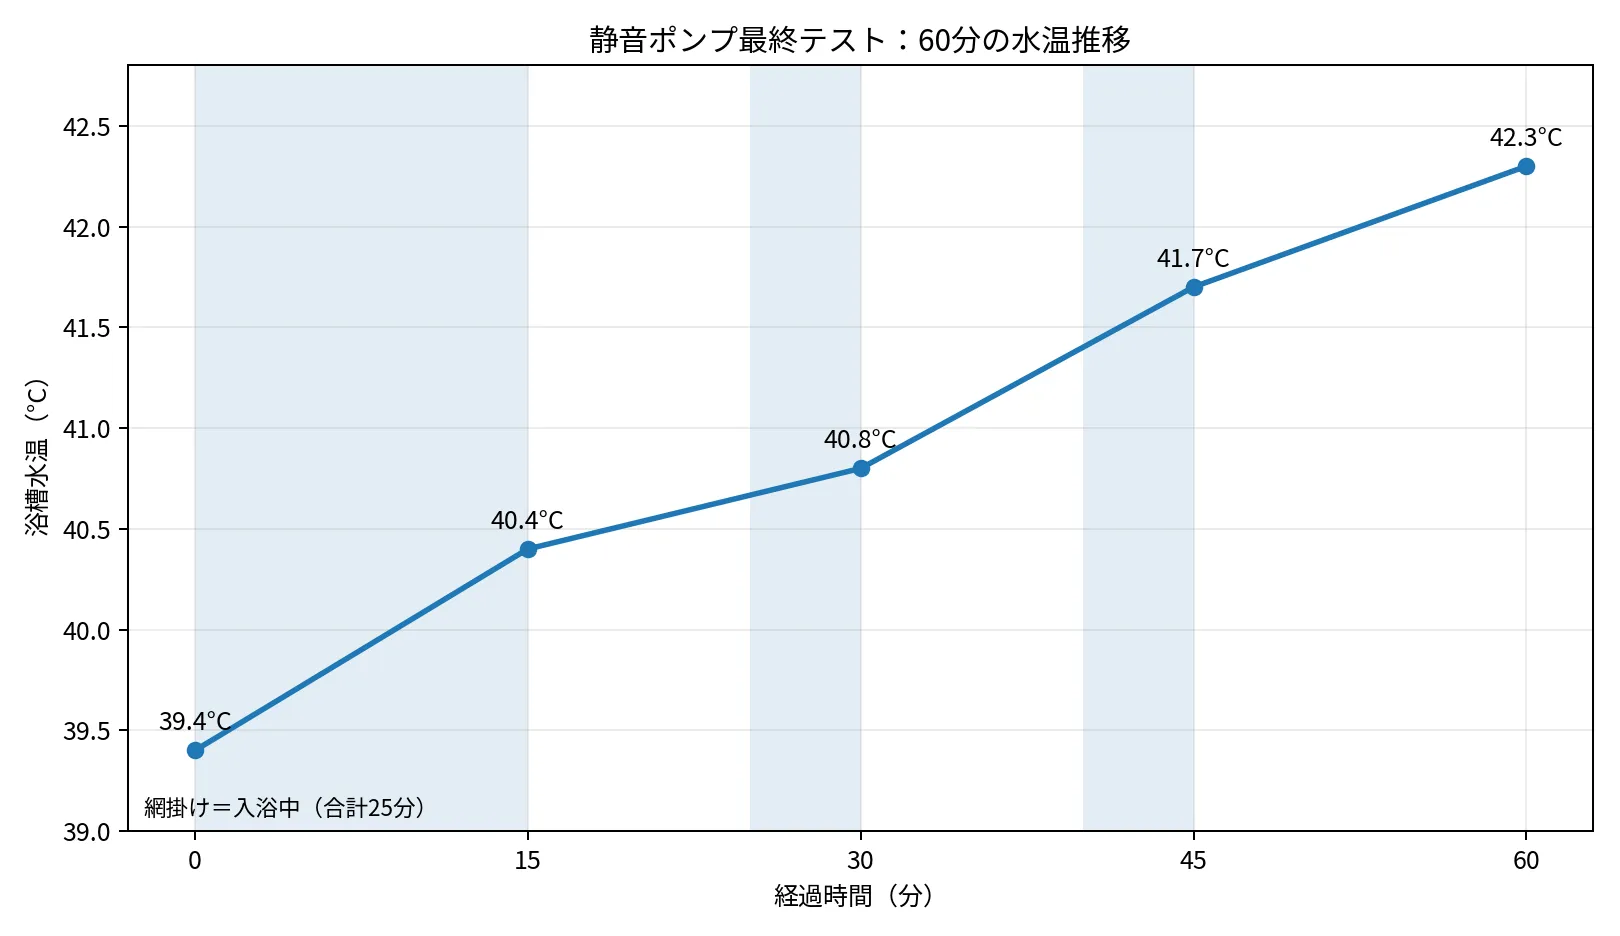
The net result was +2.9°C (+5.2°F) in one hour. Even more useful: during the first 15 minutes I stayed in the tub continuously and the water still rose from 39.4°C to 40.4°C. Under these conditions, the loop did more than prevent cooling; it continued to add heat while occupied.
Note: 42.3°C was the end point of this heating-performance test, not a recommended bath setting. For normal bathing, use a temperature appropriate for your own comfort and condition, and be cautious with prolonged high-temperature soaking.
Results will vary with room temperature, bath volume, ventilation, whether the tub is covered, plumbing losses, and the heat transferred to a person in the water. This is a result from my specific setup, not a guaranteed rate for another home.
Energy: 1.575 kWh for that day's bath test activity
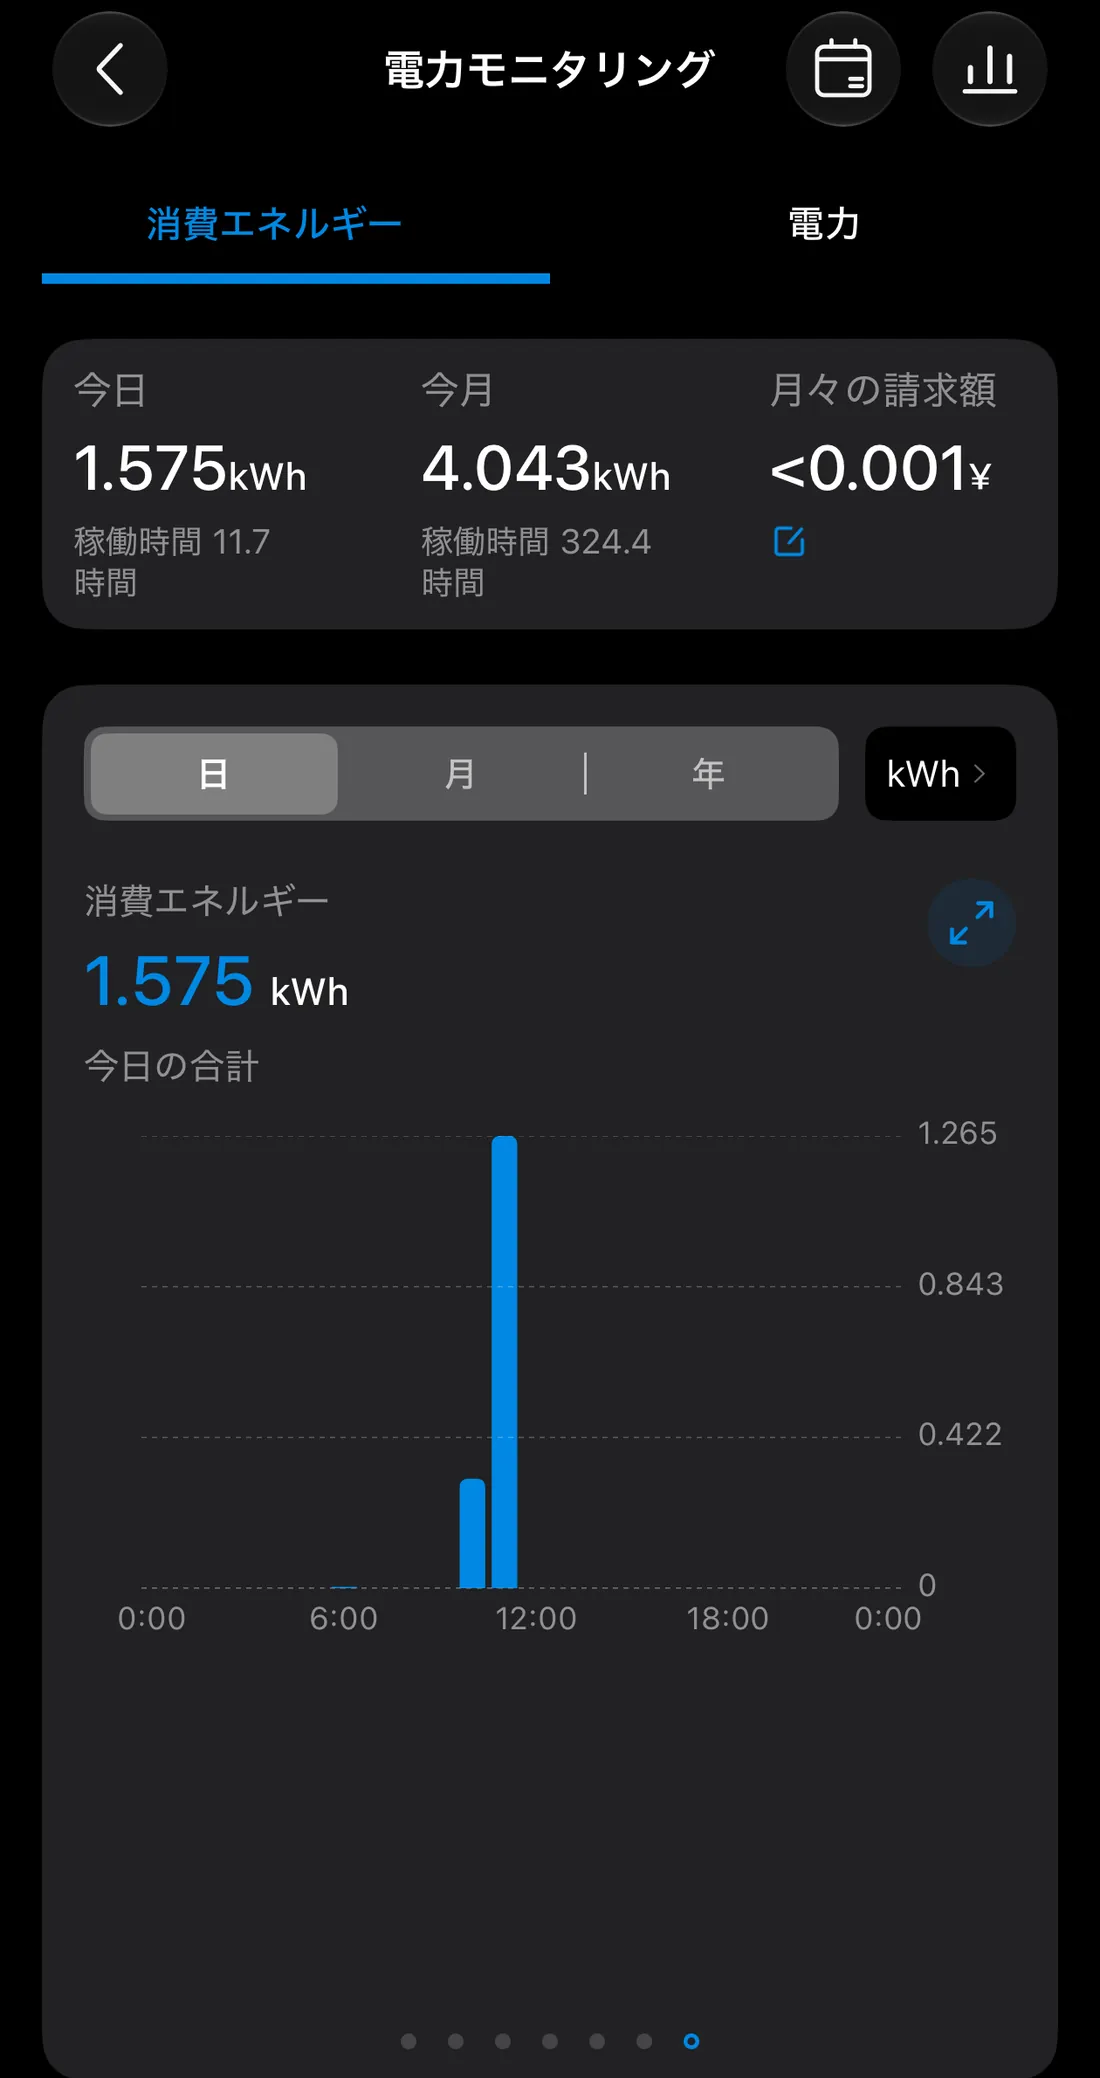
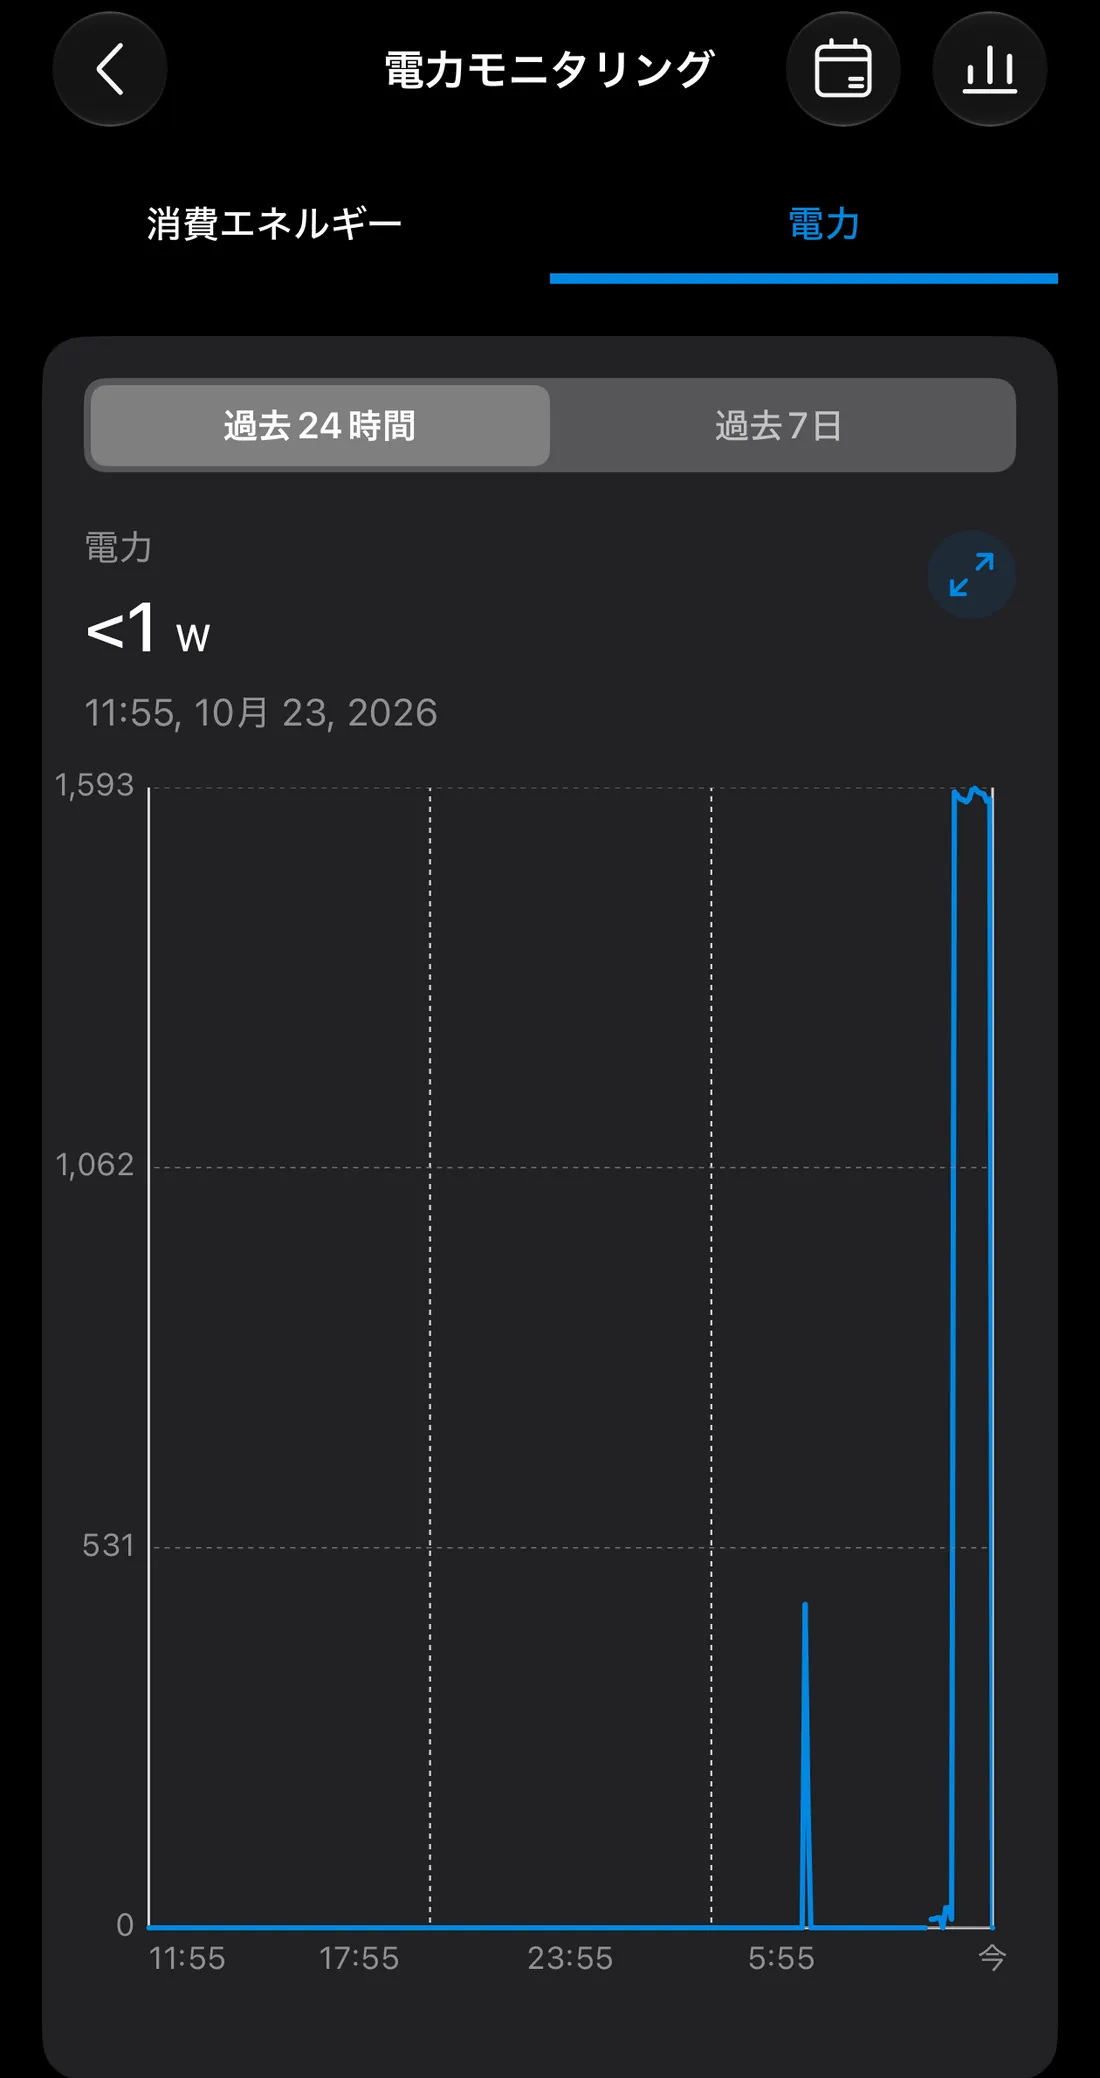
The app's daily energy total was 1.575 kWh. Everything recorded on that day was related to this bath test, but it was not a meter reset taken exactly at the 0-minute mark and stopped exactly at 60 minutes, so I treat it as the day's test energy rather than a laboratory-grade 60-minute integral.
To estimate cost, multiply 1.575 kWh by your electricity rate. At $0.15/kWh that is about $0.24; at $0.20/kWh, about $0.32; at $0.25/kWh, about $0.39.
What I learned: for a long bath, quiet matters more than self-priming
The VEVOR moved plenty of hot water and made startup easy. But an hour of diaphragm-pump mechanical noise defeated the point of building a better long-bath experience.
The final 12V brushless pump requires one extra priming step, but it is dramatically quieter and still moves enough water for the 1500W heater to maintain and raise the tub temperature.
If I started over, I would begin with the quiet circulation pump + manual/assisted priming approach. The roughly $50 self-priming pump became tuition for a useful DIY lesson: more flow and more features do not automatically make the system better.
Conclusion: our no-reheat bathtub can now stay hot through a long soak
The final parts cost was $93.65. In the 60-minute test, with 25 minutes of actual soaking, water rose from 39.4°C to 42.3°C. The final 12V pump was quiet enough that the circulation system no longer undermined the relaxation it was supposed to enable.
For homes where a bath cools down during a long soak, external recirculation feels genuinely useful. In the final layout, only hoses are in the bathwater; the pump, heater, AC adapter, and other electrical equipment stay outside the tub. If you try a similar DIY, pay close attention to keeping electrical equipment dry, securing/positioning it so it cannot fall into the tub, and preventing hose or fitting leaks from reaching the electrical side. This is a personal home experiment, so any similar DIY is at your own responsibility.
Parts and product links
Prices above are what I paid. Retail prices and availability change. Product links are included; see the Affiliate Disclosure.
Current replacement-heater candidate: price and specification comparison
The 1500W heater I actually tested is no longer sold. A currently listed similar-spec option is the SHIOUCY 110V / 1500W / 2.11-gallon mini-tank heater [Gear 7]. Its product information lists a maximum temperature of 149°F (about 65°C), and the inlet/outlet ports point upward, which looks easier for hose routing than the heater I used. [4]
The price I checked on Nov. 9, 2026 was $63.50. Using the same pump, hose, and connector prices I paid, the comparable parts total would be about $107.16 before tax. This is not the heater used for the temperature data above; I am listing it as a currently available similar-spec/price candidate.
A currently available mini-tank heater candidate with a similar basic specification and upward-facing water ports.
References
- Bayite BYT-7A015 product specifications, 12V / 2.1 GPM / non-self-priming / 30 dB / 100°C circulating-water rating (accessed Nov. 9, 2026).
- U.S. Consumer Product Safety Commission, CPSC Cautions Bubbler Bathtubs May Electrocute (guidance on keeping electrical equipment from falling into a tub, GFCI protection, and limits of protective devices).
- U.S. Consumer Product Safety Commission, Home Safety Checklist (keeping small electrical appliances away from tubs/water and testing GFCIs).
- SHIOUCY / product listing for ASIN B0BFW38PPL, 110V / 1500W / 2.11 gal mini-tank heater (price/specification comparison candidate; product information lists a 149°F maximum temperature; accessed Nov. 9, 2026).
I posted the final quiet-pump configuration and the 60-minute temperature result on X. The full trial-and-error path and detailed numbers are organized here in the article.
Questions or comments?
If you have questions about the circulation layout, pump choice, or temperature test, send them here.