
Zipper Keeps Splitting Open?
A Needle-Nose Pliers Fix, Why It Works, and What to Replace Next
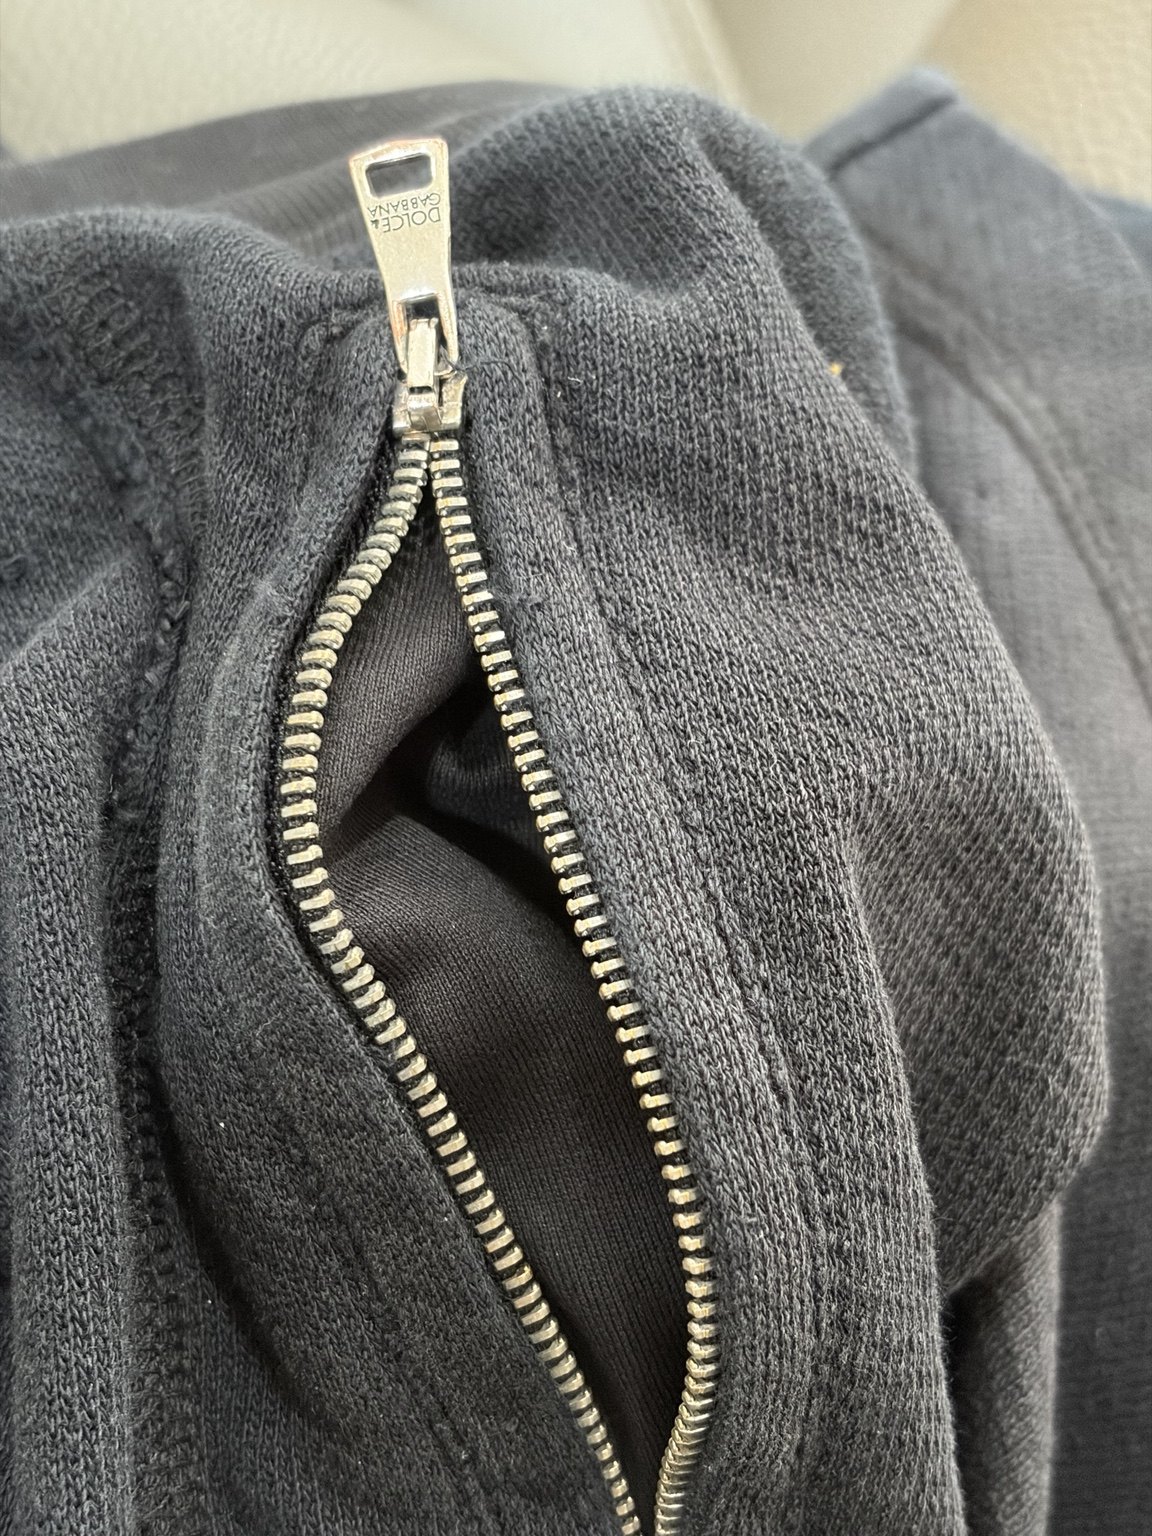
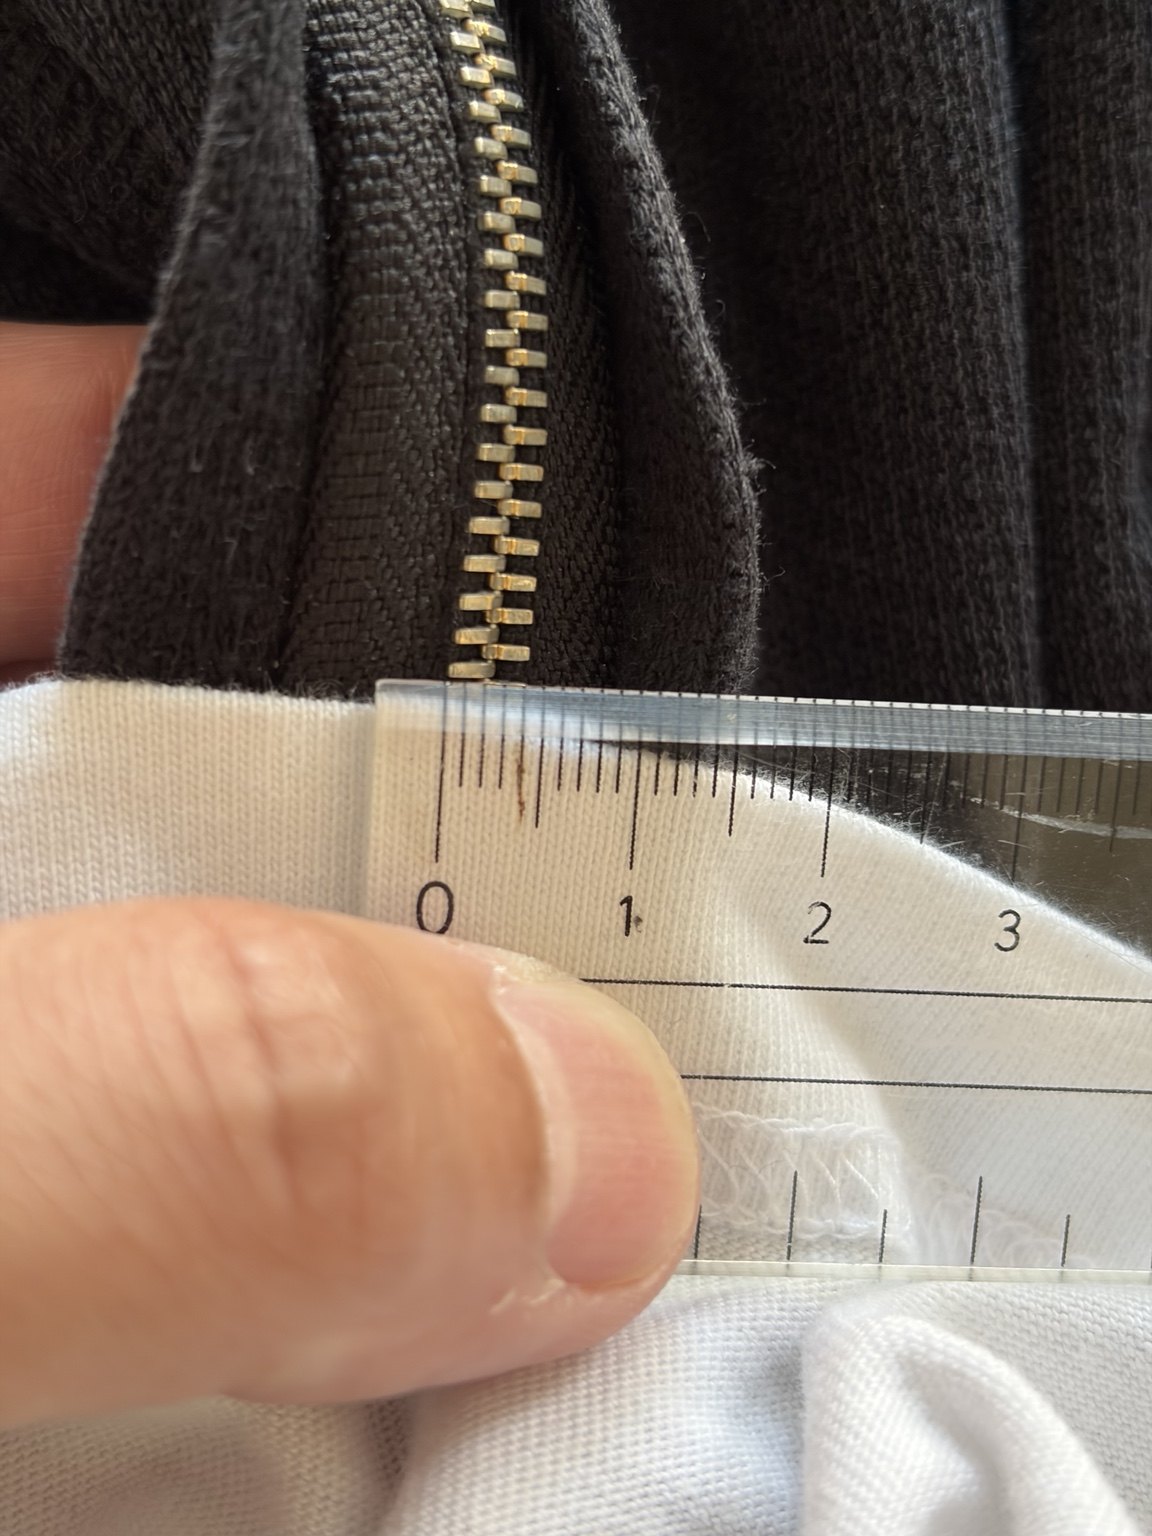
The slider moved normally, but the zipper opened right back up behind it. The metal teeth looked intact, so I tried a very small adjustment: gently squeezing the narrow end of the slider with needle-nose pliers. It worked immediately. YKK documents the same temporary repair when internal slider wear has reduced its closing force. I also measured the closed chain at about 5 mm and looked at what slider replacement would involve if the problem comes back.
Bottom line
1. The symptom: the slider moves, but the zipper opens behind it
This was not a stuck zipper. The slider traveled upward, but the two rows separated immediately behind it. I first checked for missing elements, obvious deformation, and trapped fabric. Nothing major was visible.
YKK says that when the elements themselves are undamaged but the zipper will not stay engaged, internal slider wear can be the cause. Its FAQ also notes that on older garments, a zipper that closes and then splits behind the slider is often associated with reduced closing force inside a worn slider. [1]
Missing metal elements, torn zipper tape, or broken stitching that holds a coil to the tape are not the same problem. YKK lists several of those as non-repairable cases. This slider adjustment is for a zipper whose elements are still basically intact. [1]
2. What I did: lightly squeeze the narrow end of the slider
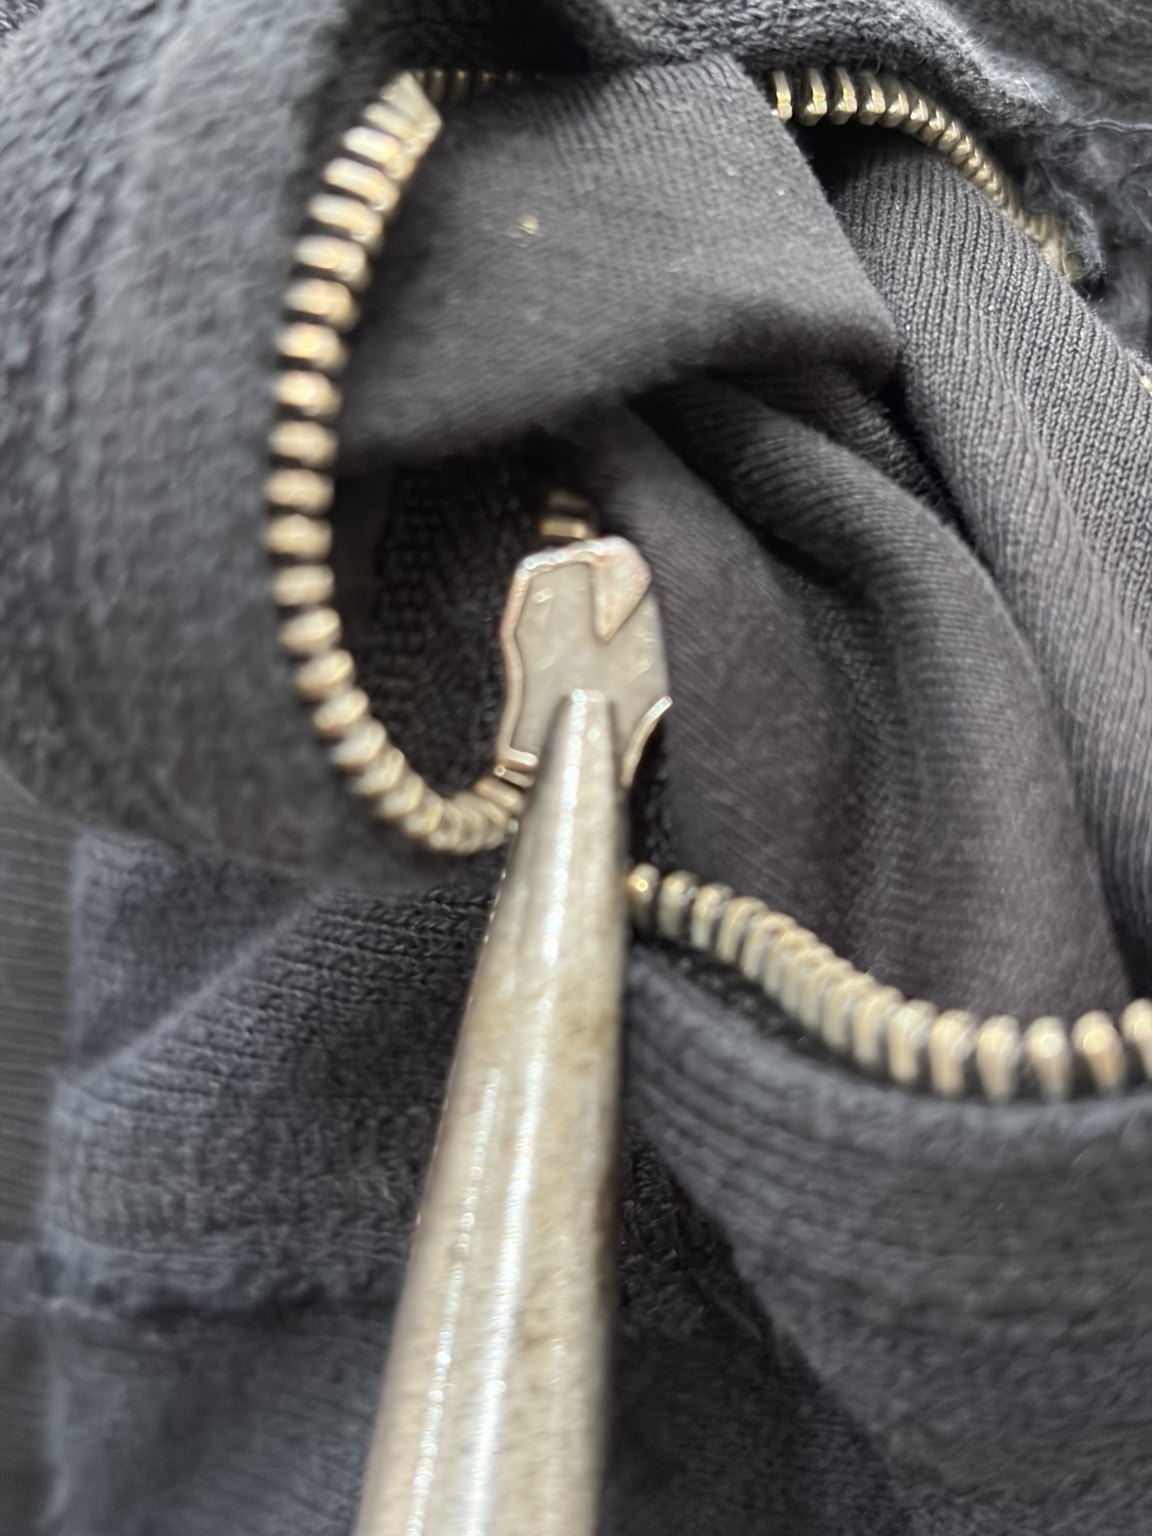
- Check the elements and tape first. Look for missing teeth/elements, distortion, tears, or trapped fabric.
- Use needle-nose pliers on the narrow end of the slider body. Apply only a tiny amount of pressure from top to bottom.
- Test immediately. If it still splits, make another very small adjustment rather than one large squeeze.
- Stop if the slider becomes stiff. Over-tightening can create a new problem.
This is not just a random internet trick. YKK's own FAQ describes lightly squeezing the narrow lower portion of a worn slider with pliers as a simple repair, while also warning that it is temporary and may need a full repair if wear continues. [1]
3. Result: it started interlocking normally again
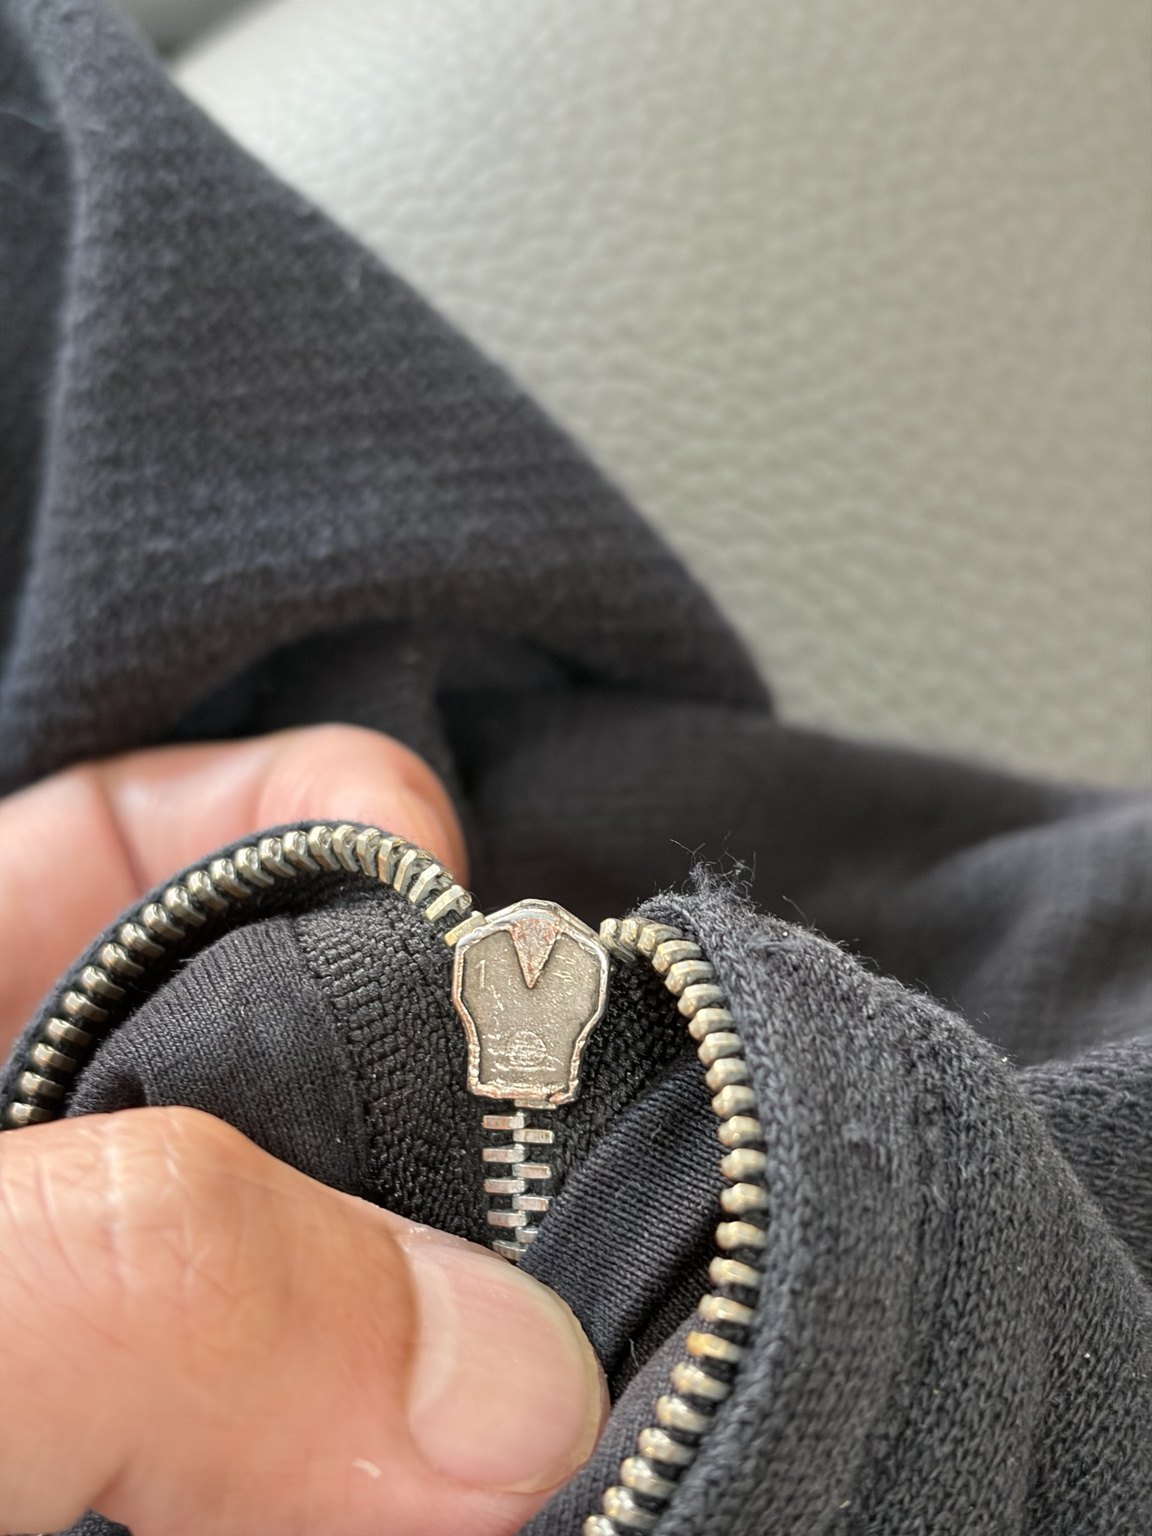
After: the metal elements now stay interlocked behind the slider.
For this zipper, the fix took only a few minutes and no parts. The immediate result was a normal close again. I have not yet tested long-term durability, so if the zipper starts splitting again, I would replace the slider rather than keep squeezing it repeatedly.
4. Why does this work?
The pull tab does not directly force the two rows together. YKK explains that the elements are bent and guided by the slider so they engage using a gear-like interlocking action. [2]
YKK's repair FAQ goes one step further: the zipper's closing function depends on the internal dimension at the narrow lower part of the slider. As that area wears, the slider can lose enough closing force that the elements do not fully engage. [1]
I did not repair the metal teeth. I slightly restored the clearance of the part that guides those teeth into engagement. That is why this can work when the elements are intact but the zipper keeps splitting open.
5. If it comes back: this zipper looks serviceable with a slider replacement
At the top of this zipper, both sides have visible metal top stops. A top stop keeps the slider from running off the end. With the correct replacement slider, this layout appears suitable for the standard repair sequence: remove a top stop, slide off the old slider, install a matching new slider, test it, and fit a new stop.
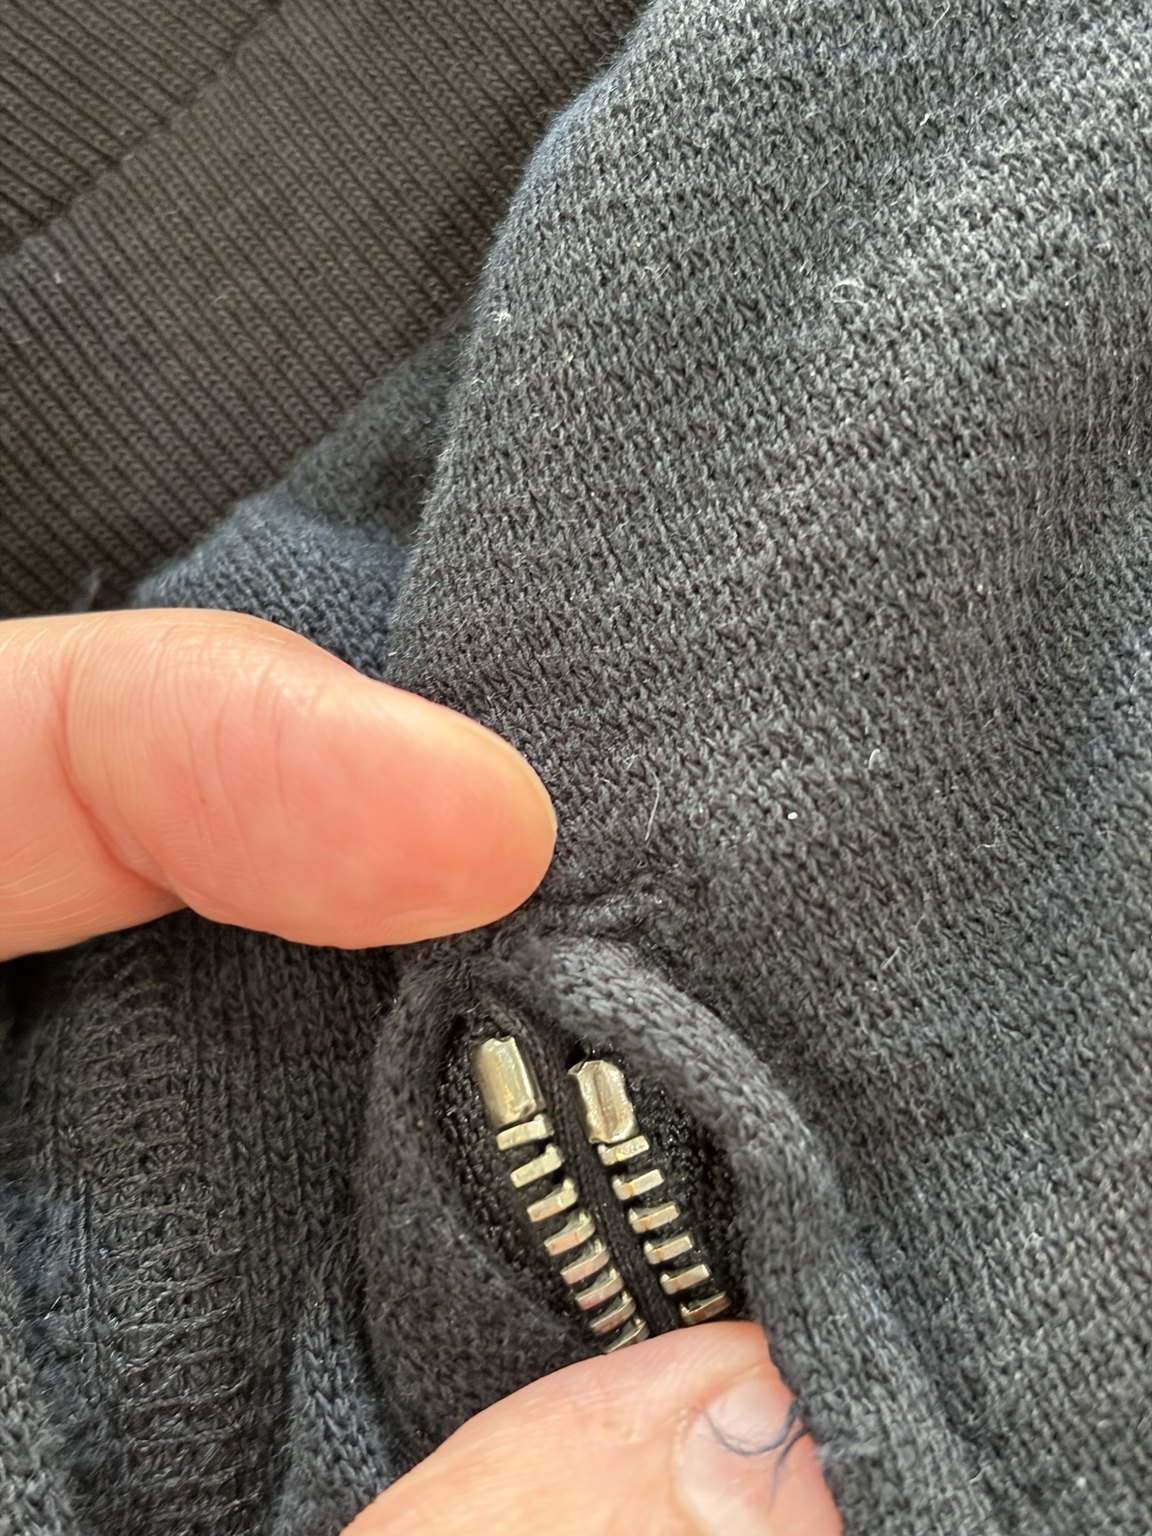
iFixit's slider-replacement guide follows the same basic sequence: remove the top stop, remove the damaged slider, install a matching slider, then restore a stop so the new slider cannot come off the end. [4]
About 5 mm does not guarantee “#5 fits”
YKK describes zipper size in terms of chain width and offers metal zipper size families such as No.3, No.4, No.5, No.7, No.8, and No.10. [3] Since this closed chain measures about 5 mm, I would start by investigating #5-class metal sliders.
That is still an inference, not a confirmed part number. The manufacturer, metal/coil/molded chain type, geometry, and locking mechanism all matter. This garment also has a branded pull tab, so a generic replacement may change the look. As long as the original slider keeps working after this adjustment, leaving it in place preserves the cleanest result.
6. My repair order for this type of zipper
- Inspect first: missing elements, torn tape, trapped fabric, or major deformation.
- Elements intact but it splits behind the slider: try one tiny slider adjustment.
- Problem returns: replace the slider and top stop with properly matched parts.
- Elements or tape are damaged: replace the zipper or take the garment to a repair shop.
This was a good example of a repair that is worth trying before replacing an entire zipper: a few minutes, one common hand tool, and an immediate functional result.
Takeaways
- A zipper that closes and then splits behind the slider may have a worn slider rather than damaged teeth.
- YKK documents a temporary repair: lightly tighten the narrow lower part of the slider with pliers. [1]
- Work in tiny steps. Too much pressure can make the slider bind.
- The repair worked immediately here, but long-term durability has not been tested.
- If it returns, the next step is slider replacement. This chain measured about 5 mm, so #5-class parts are the first range to check, not a guaranteed match.
- Visible metal top stops make this zipper look relatively straightforward to service using a standard slider-replacement method.
Tool and replacement-part references
- Needle-nose pliers — I used a pair I already had. One example of the same tool type: Klein Tools D203-6 →
- #5 metal zipper slider repair kit (reference only) — an example kit with metal sliders and stops: ZipperStop #5 YKK metal slider kit →
- #5 top stops (reference only) — replacement stops for a slider-replacement job: Zipper Shipper #5 top stops →
These replacement parts have not been confirmed compatible with this garment. Fit depends on the zipper manufacturer, chain type, slider geometry, and lock mechanism—not size alone.
References
- YKK Japan, Zipper FAQ (internal slider wear, temporary pliers adjustment, non-repairable damage, and slider replacement; accessed Oct. 13, 2026).
- YKK Japan, Zipper basics (how elements are guided and interlocked by the slider; accessed Oct. 13, 2026).
- YKK Japan, Zipper sizing (size expressed by chain width; accessed Oct. 13, 2026).
- iFixit, How to replace a zipper slider (basic top-stop and slider replacement sequence).
Questions or comments about this repair?
If you have a similar zipper symptom, slider-sizing question, or replacement issue, send it here.
I shared the splitting zipper, the pliers adjustment, and the working result there as a quick DIY log.